The ultimate tutorial of Microsoft Surface recovery
According to many Microsoft Surface users, the operating system easily gets crashed. So how to handle the issue? The tutorial will show you 3 ways.
Warnings:
1. The following content involved in this tutorial is for reference only. And for the content of core technology, please refer to the official Microsoft docs.
2. NEVER make a step over while reading the tutorial, you should read them step by step.
3. Before you take any of the steps below, make sure you WILL NOT remove the USB flash disk while the system is recovering, cut off the power supply, do a force-shutdown by holding the power button.
Besides, make sure you have backed up all your important files to a safe space.
4. No matter that whether your device are currently working well, if you have forgotten your Bitlocker key, donot follow this tutorial.
5. For official Microsoft docs, visit Restore or reset Surface for Windows. And do not read any of the following content in this tutorial.
Method1
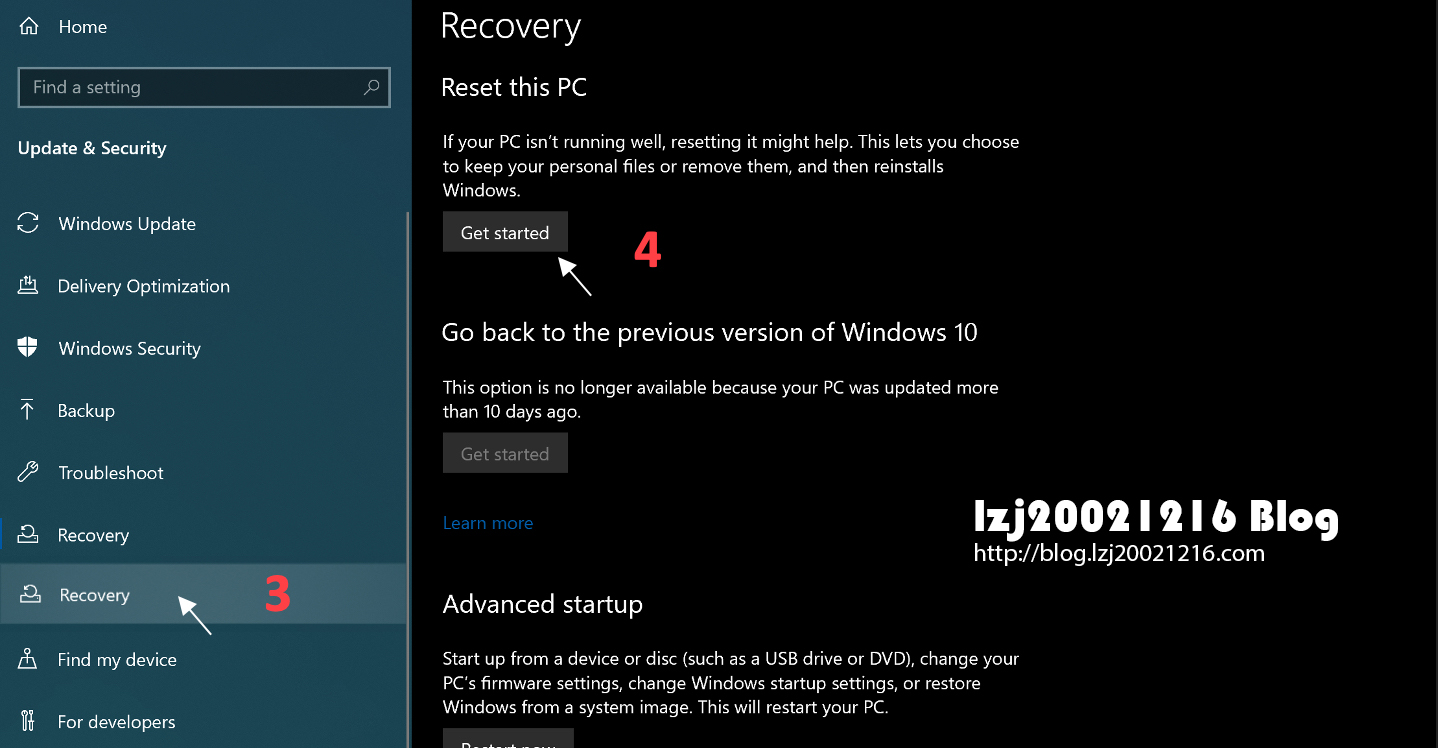
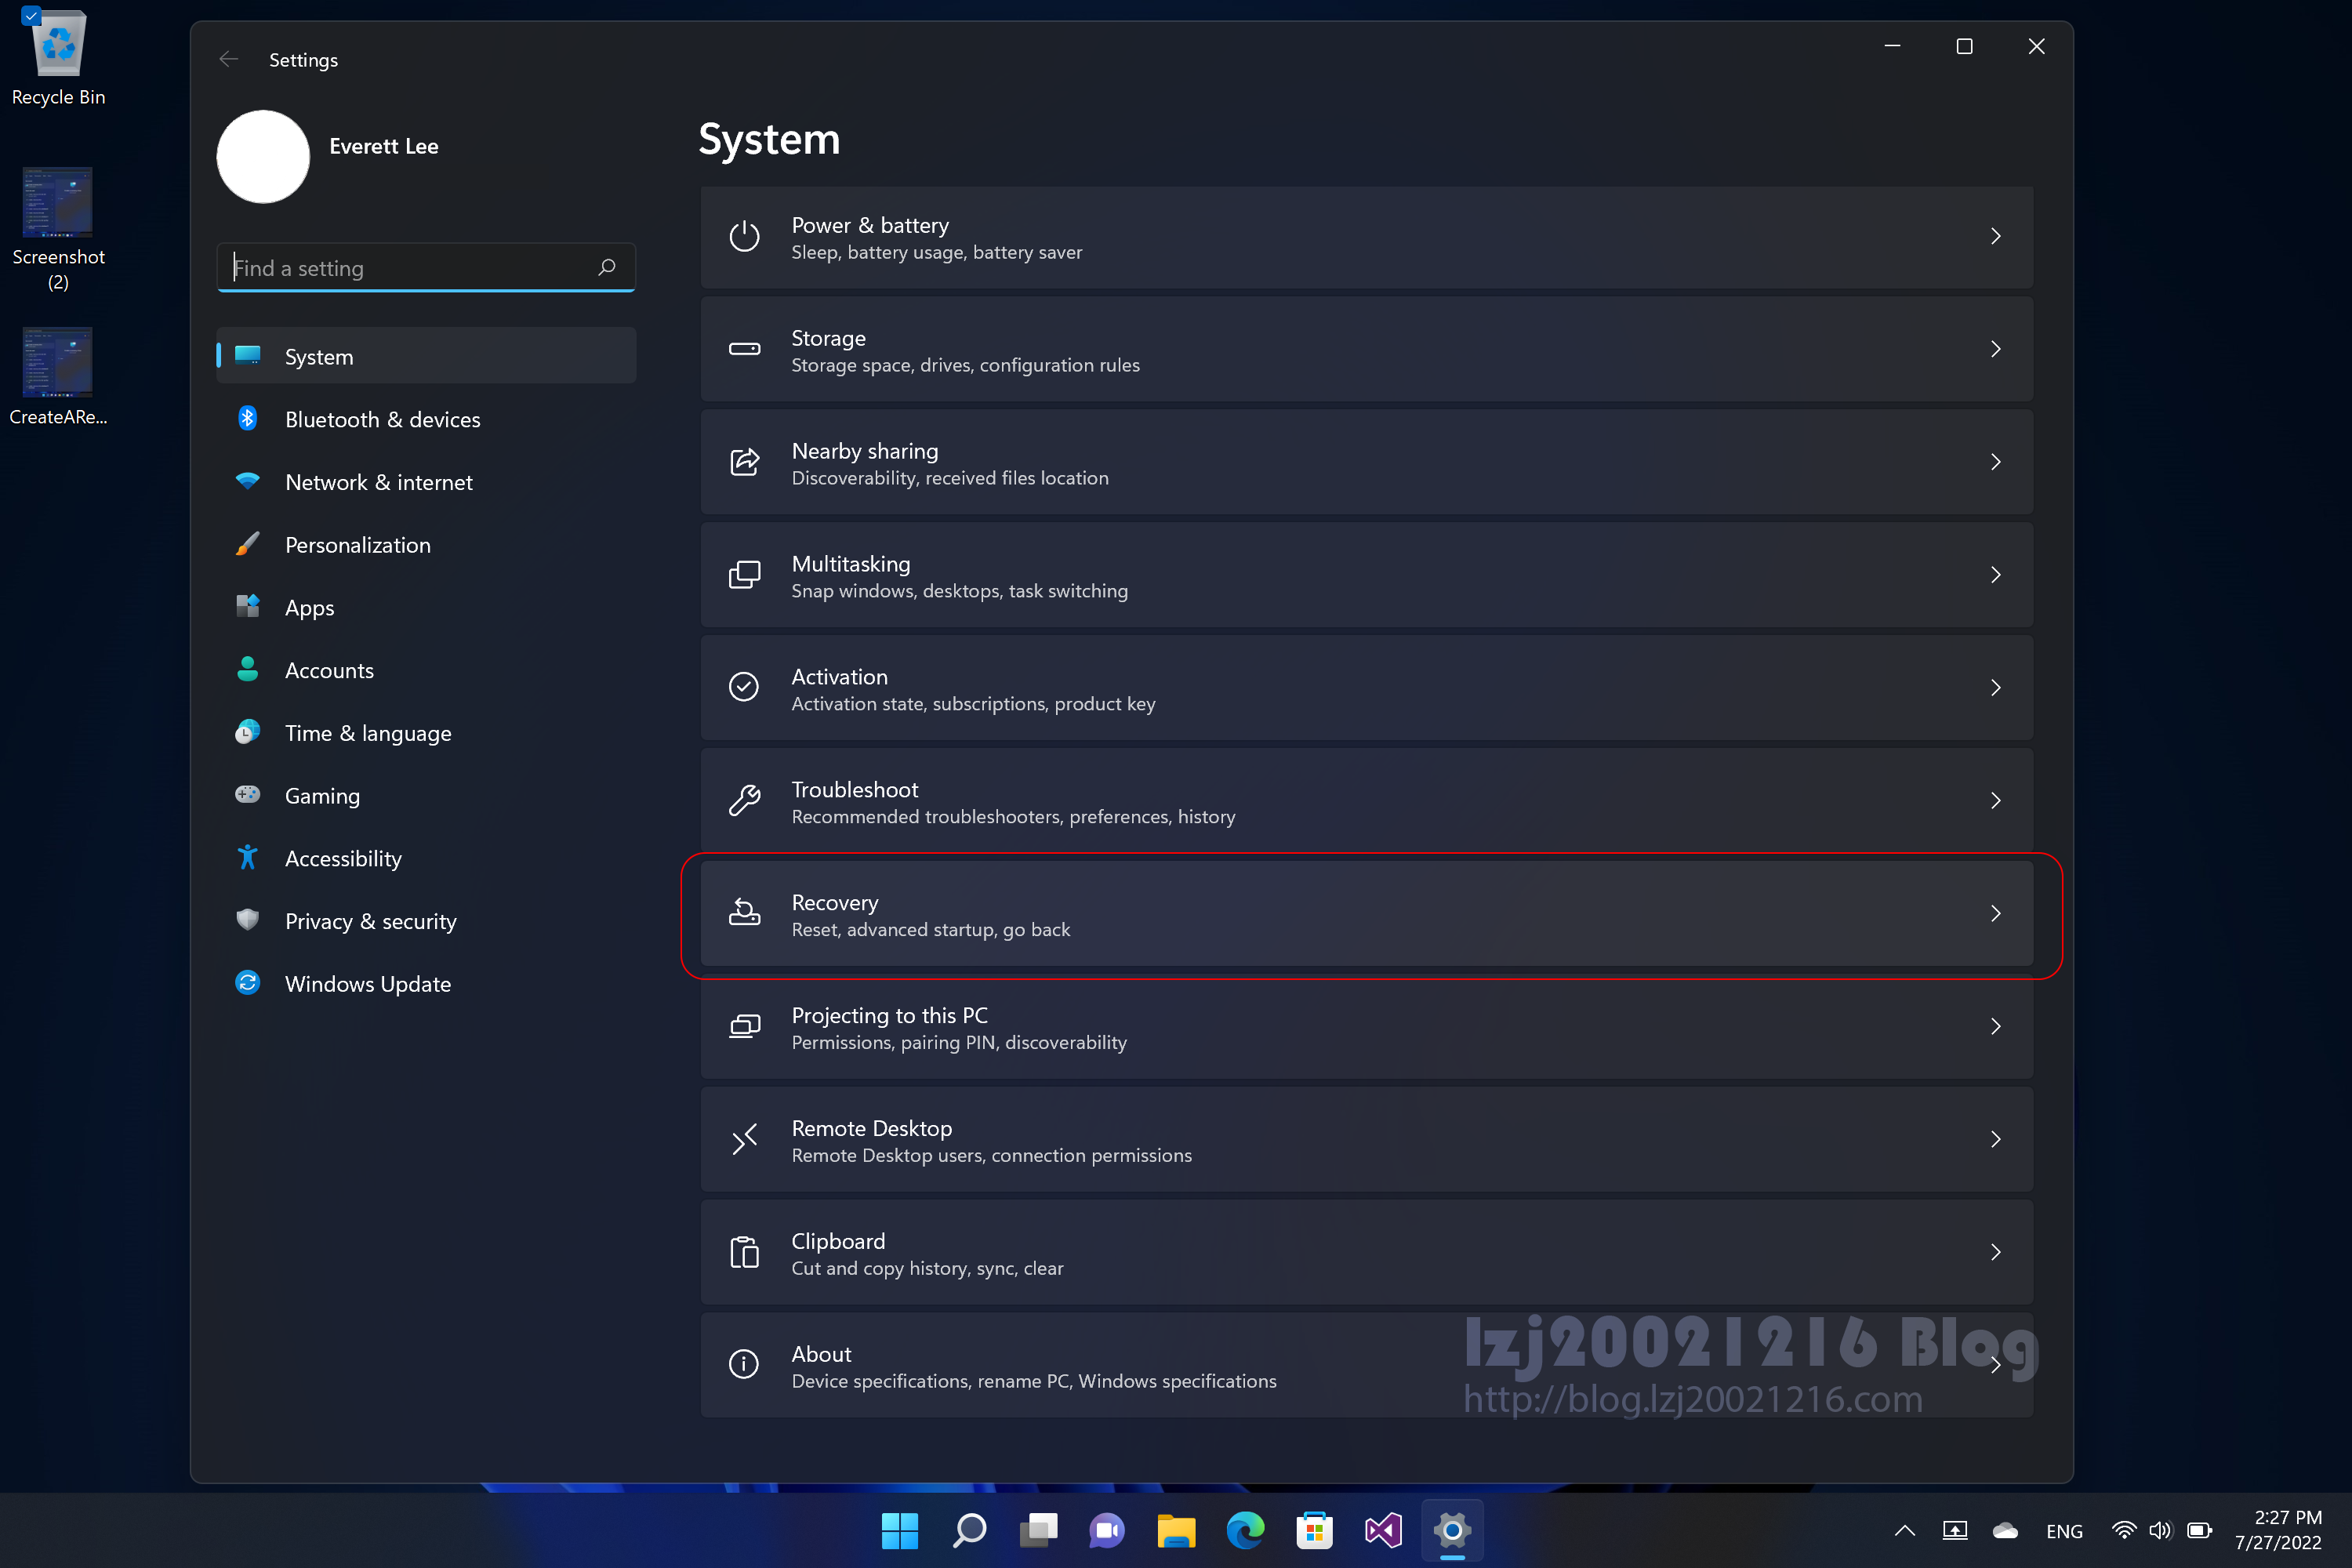
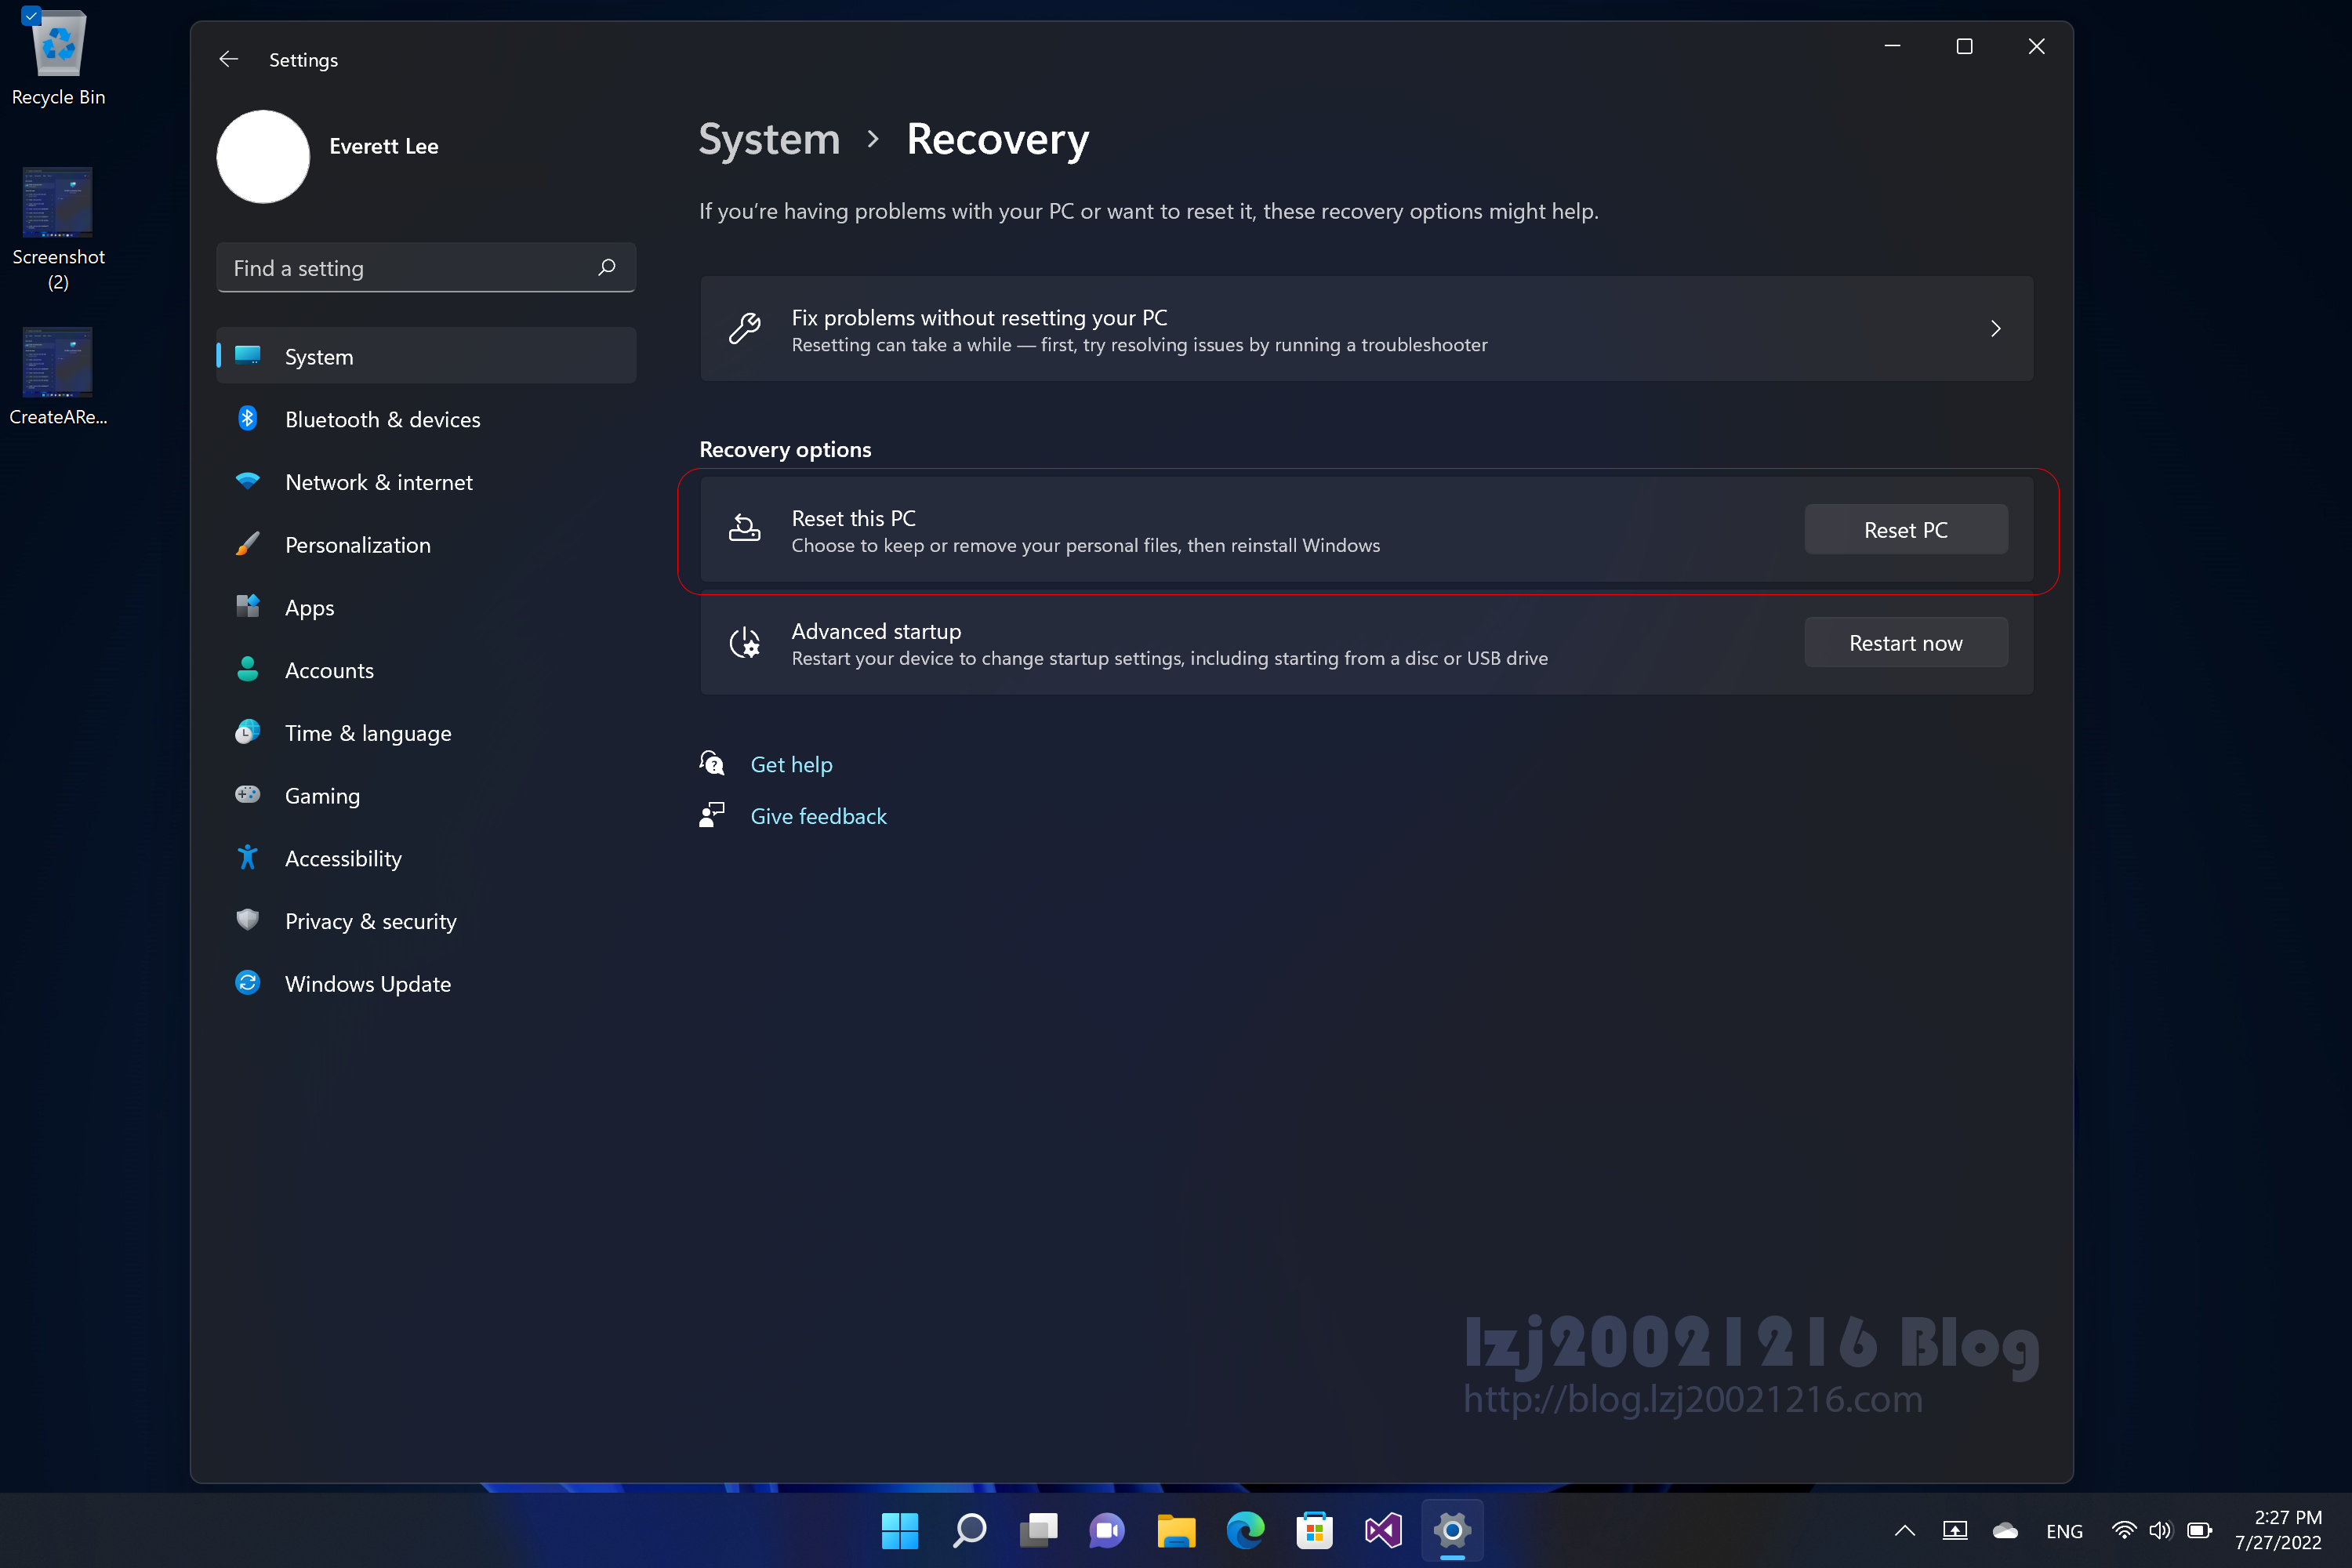
Recover your device with built-in Windows Recovery function
Warning:
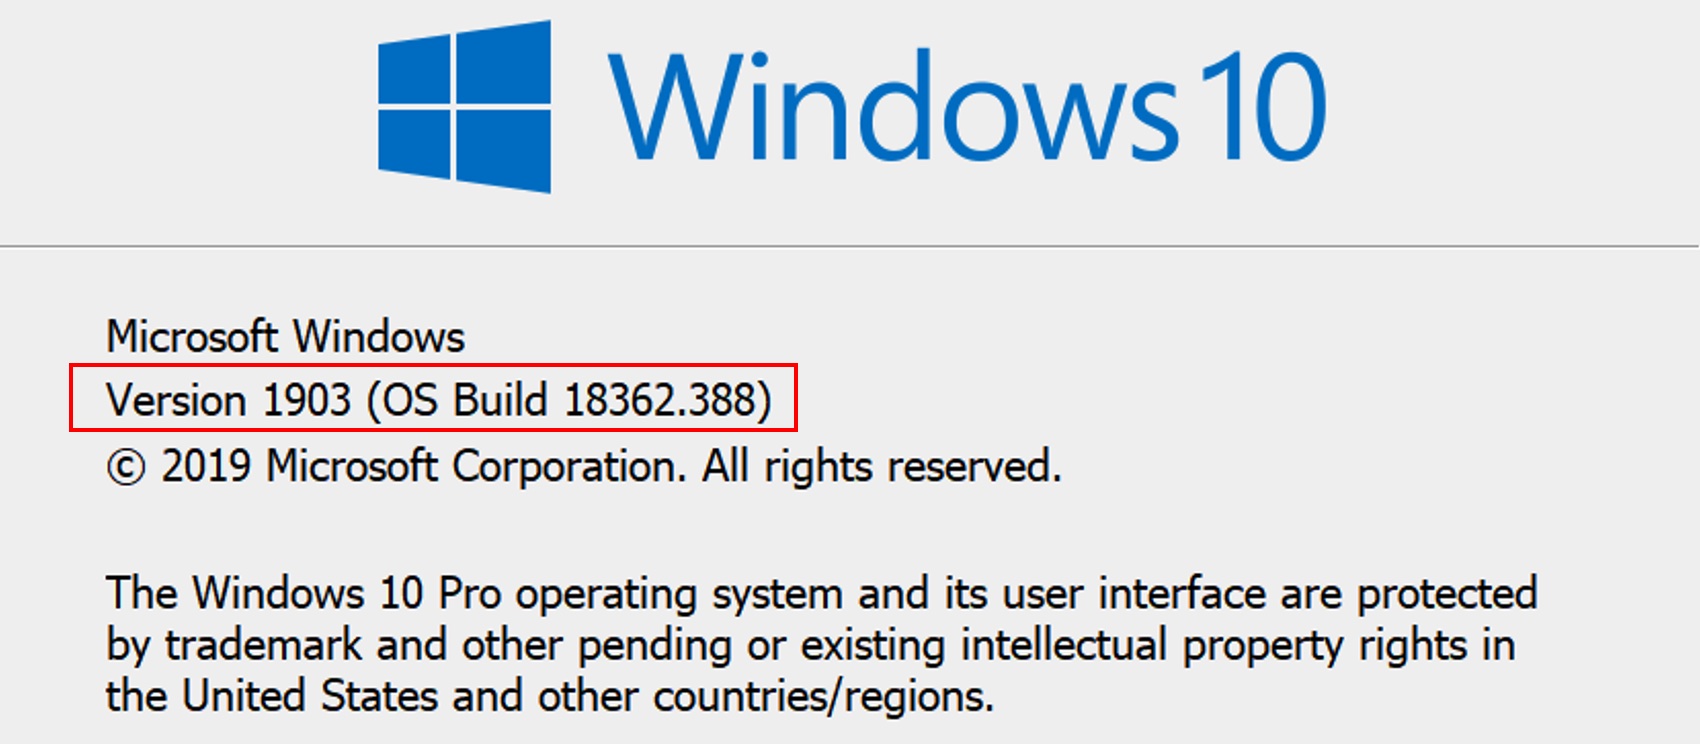
Make sure that your device is not running Windows 10 Version 1803.
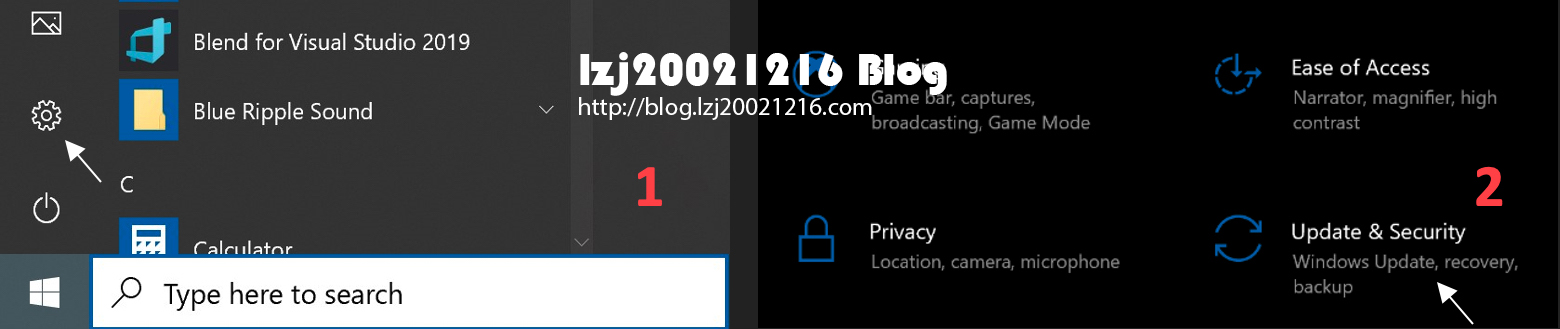
To identify your current Windows version, press Windows Logo key and R at the same time, then type Winver in the text field and click OK button or press Enter.
The marked area shows the system version.
For Version 1803 users, follow Method 2 or Method 3 below.
Windows 10
Windows 11
Which are personal files?
Warning:

Personal files include those in the user folders including Desktop Documents Downloads Music Pictures Videos

If it asks you for a Windows Installation Media, you can choose the Cloud download option or use a Surface Recovery Image with Method 3.
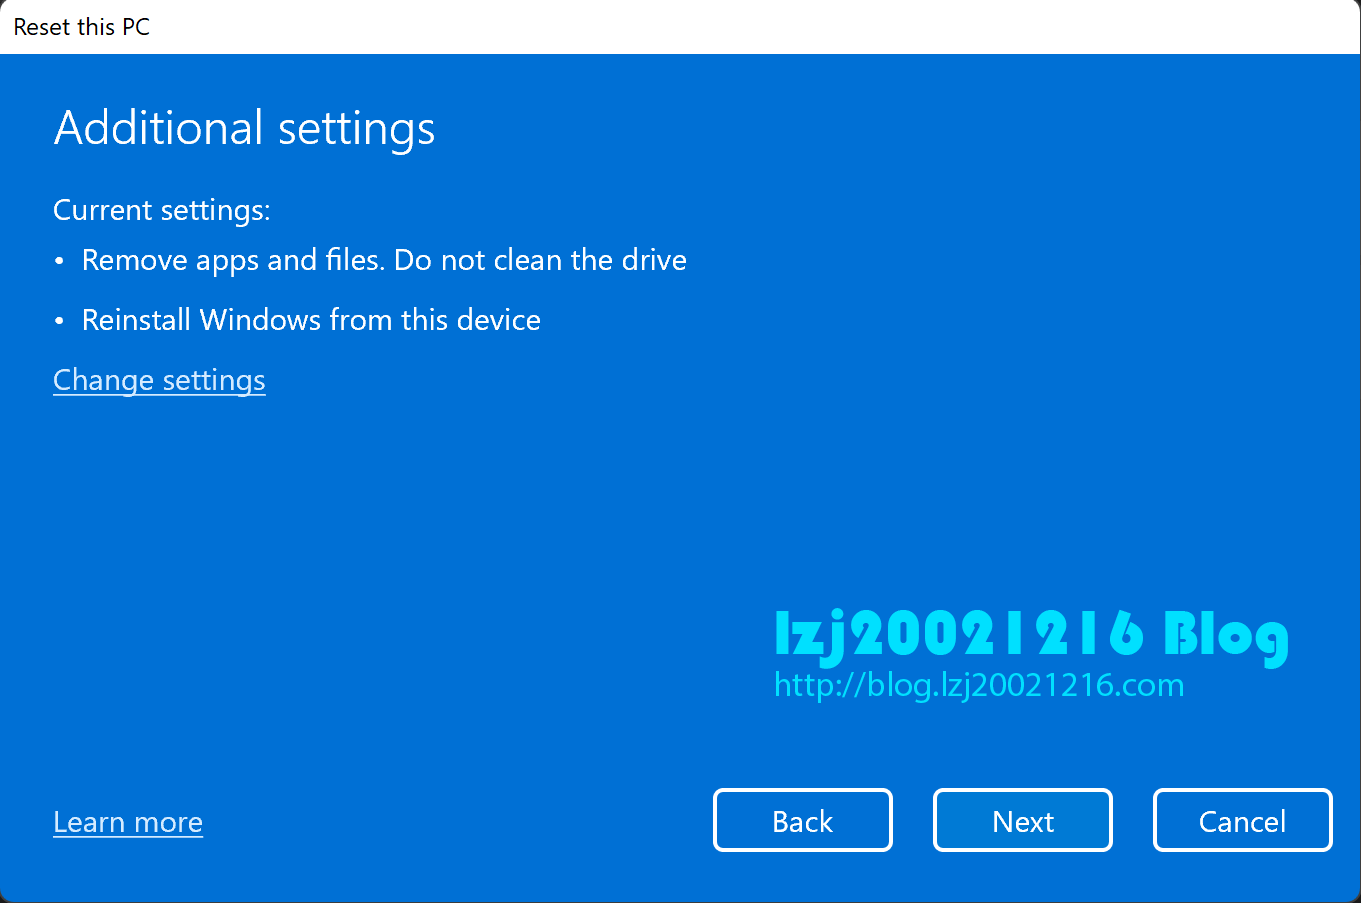
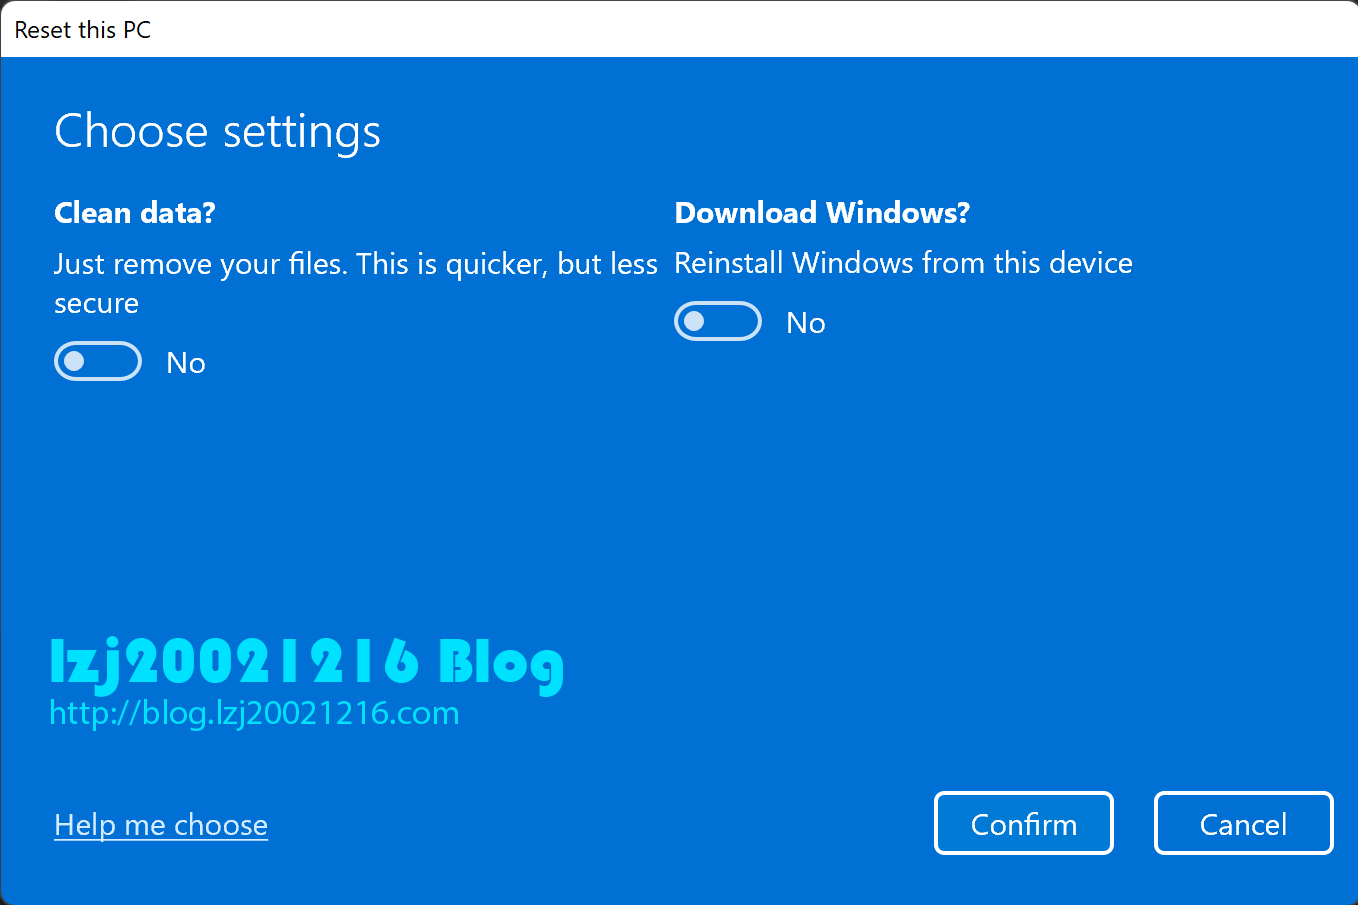

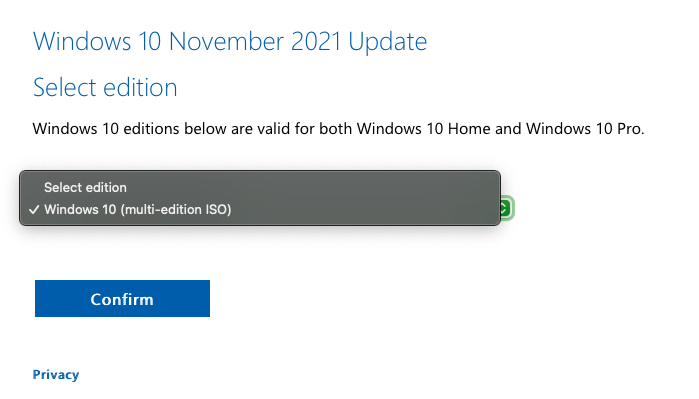
Get the operating system repaired in a quick way using a Windows iso file Some versions of Windows 10 will get broken after using the built-in Windows Recovery function. Make sure that your device is connected to the Internet.
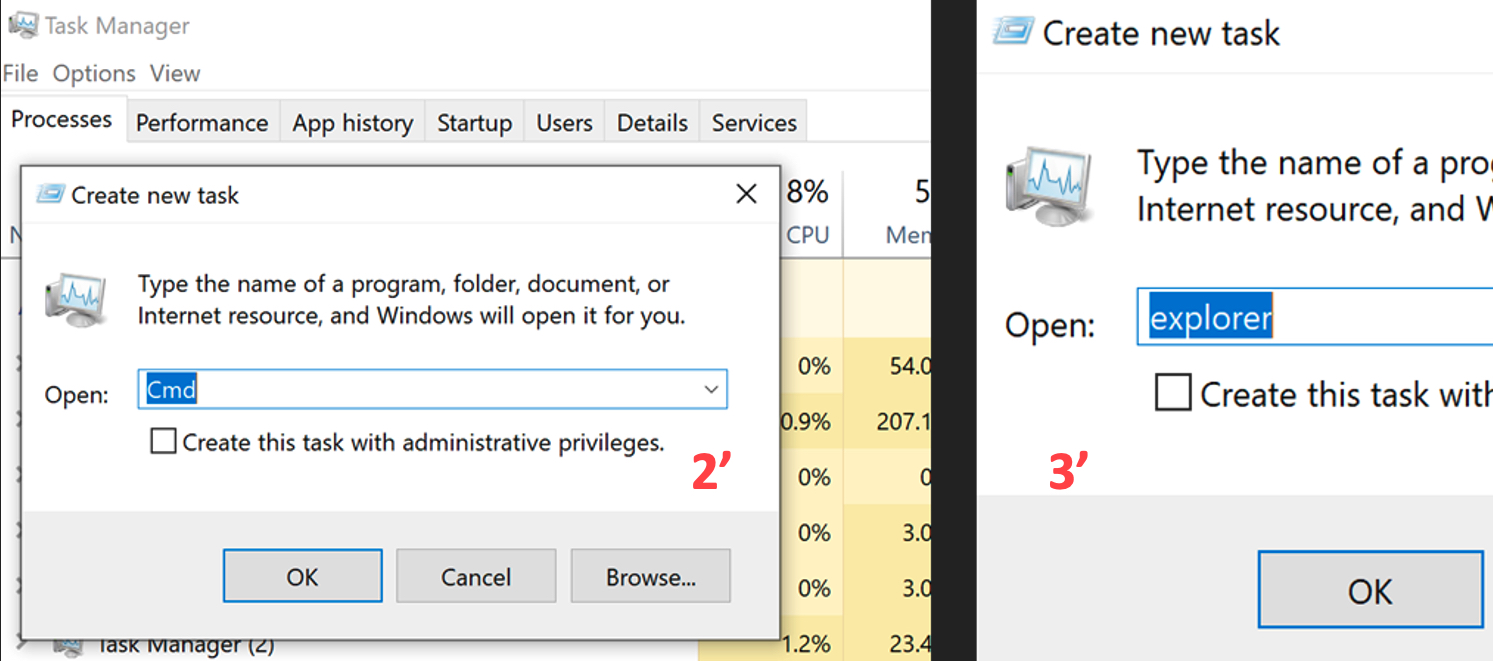
If you cannot open it by clicking, press Ctrl Alt and Del at the same time and then click Task Manager. Choose 64-bit image to download. Choose keep everything.
The method works on both Windows 10 and Windows 11

In Task Manager window, click File and click Create new task.
Input explorer in the text field and click OK button or press Enter.


Your device will restart several times.
Recover your device with Surface Recovery Image
Requirement:
1. Make sure you have internet connection and a PC running Windows 10 or above.
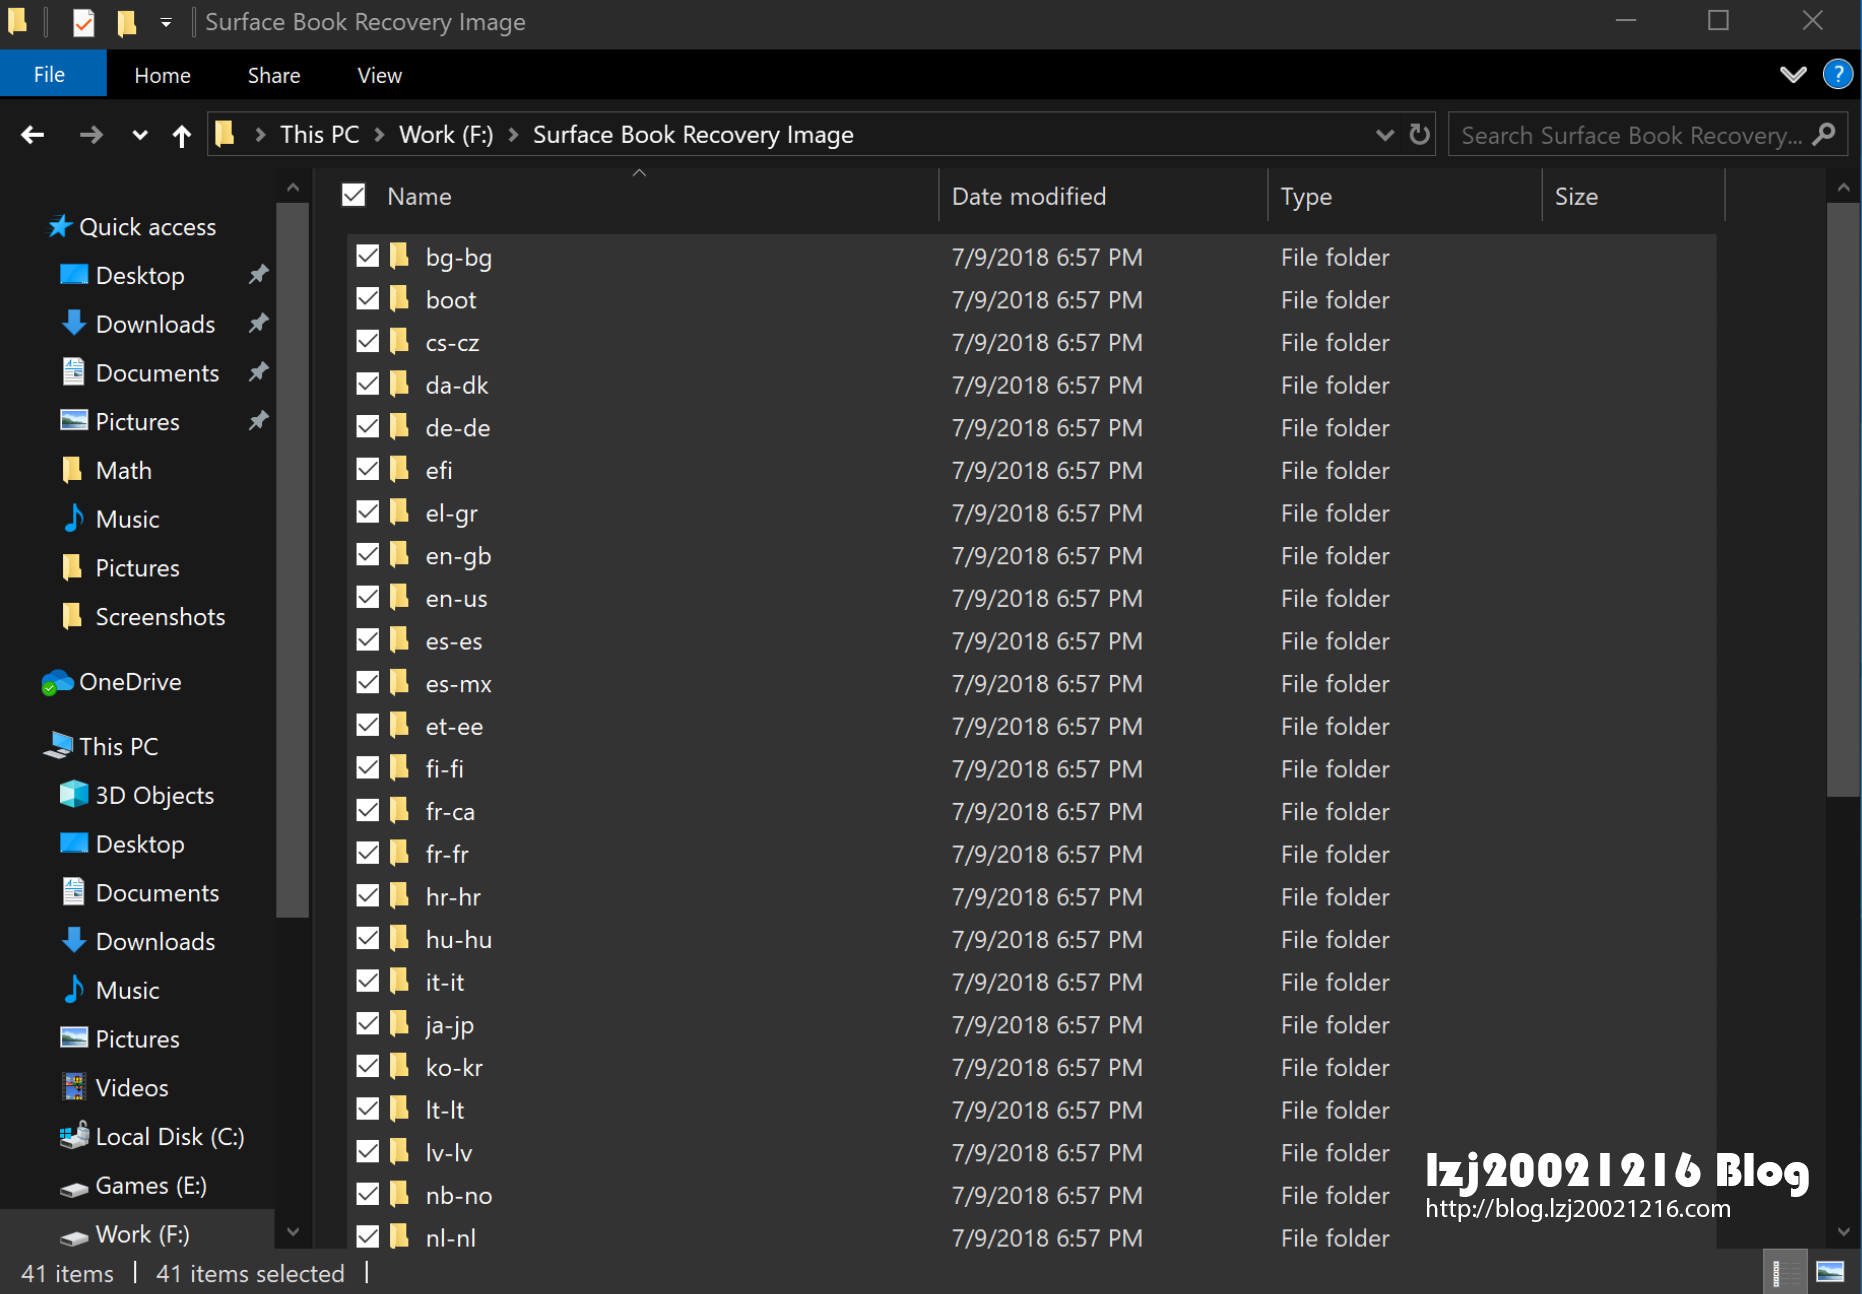
2. Make sure you have a USB 3.0 flash disk with the capacity of at least 16GB. (This is up to the image you download. Some of the recovery images only require the space under 8GB, and some ones also require it over 16GB.)


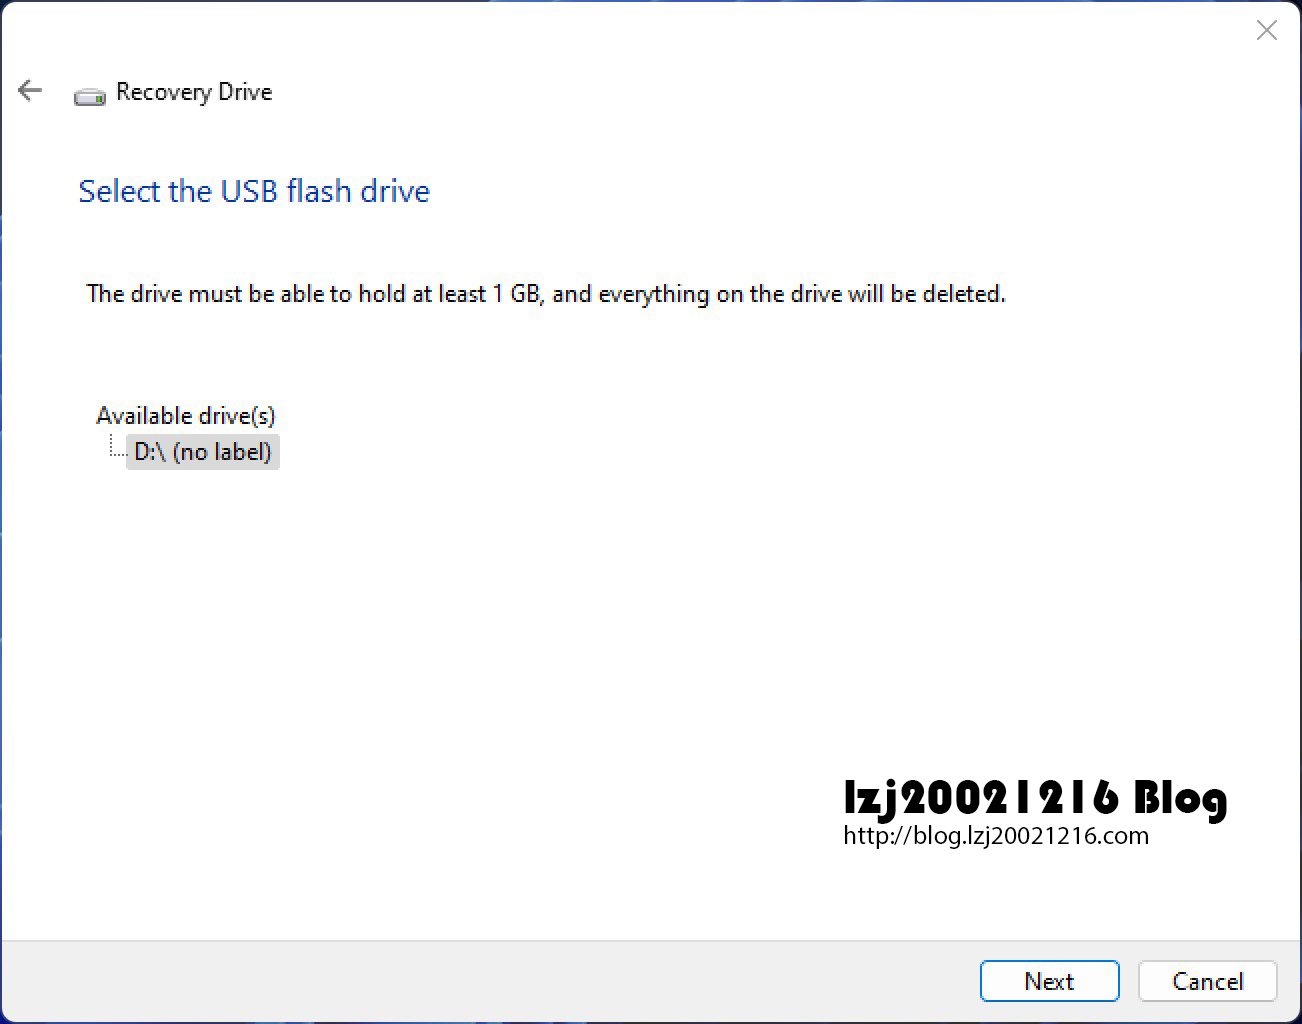
Select the drive you want to use as the recovery drive and then click Next.
Hold on and wait for the process to finish.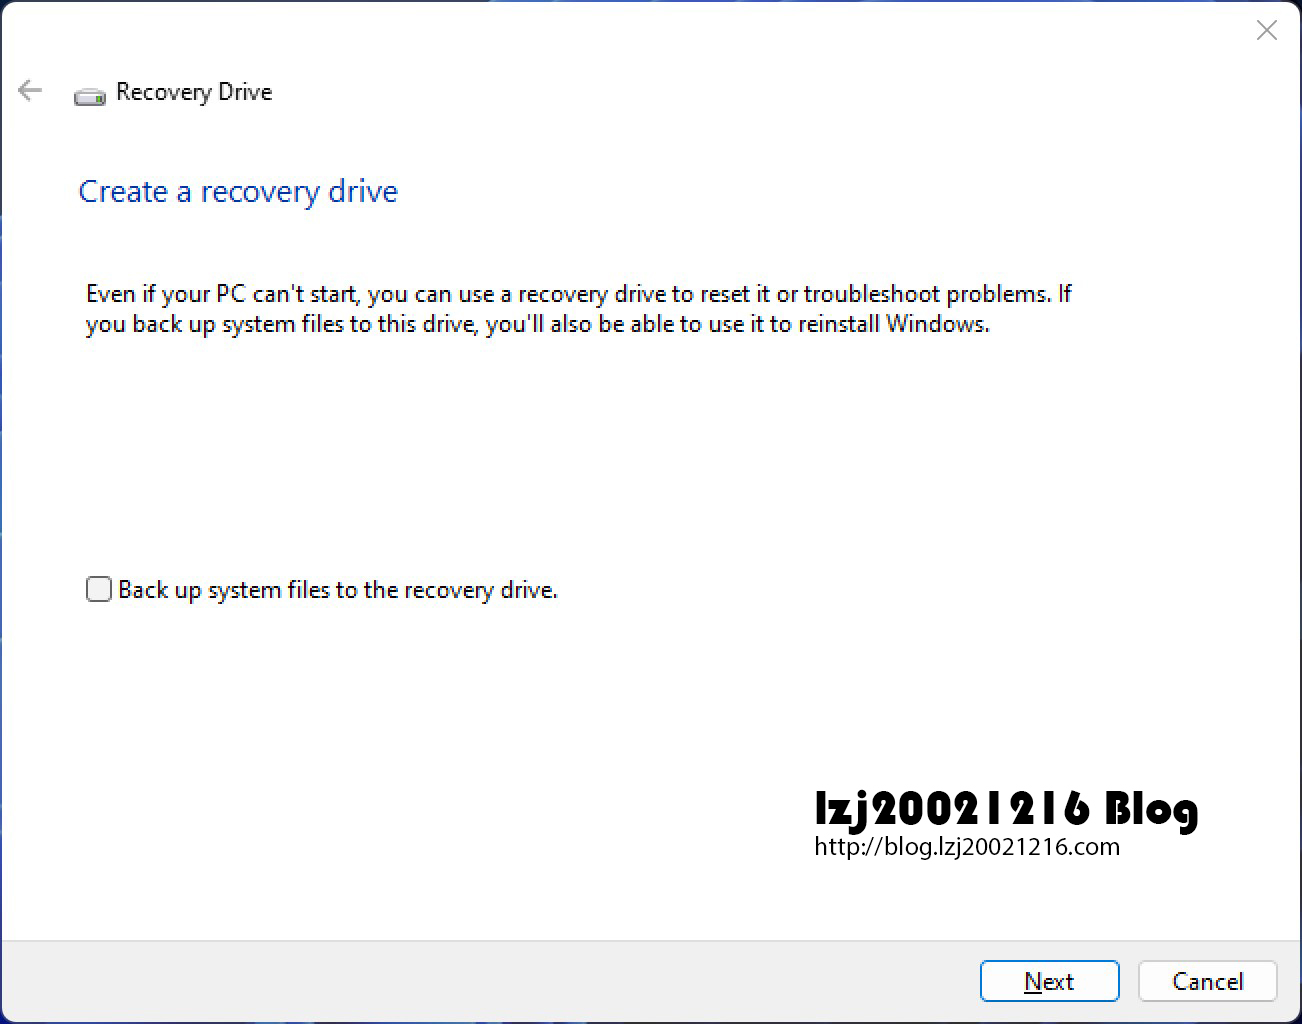
If it warns that duplicate files exist, choose the replace option.
When your Surface device is fully-shutdown, insert the recovery drive and hold Power Button and Volumn Up Button at the same time until it loads to Surface UEFI.
- In Surface UEFI, select Boot configuration label on the left, and drag USB Storage upon Windows Boot Manager
-
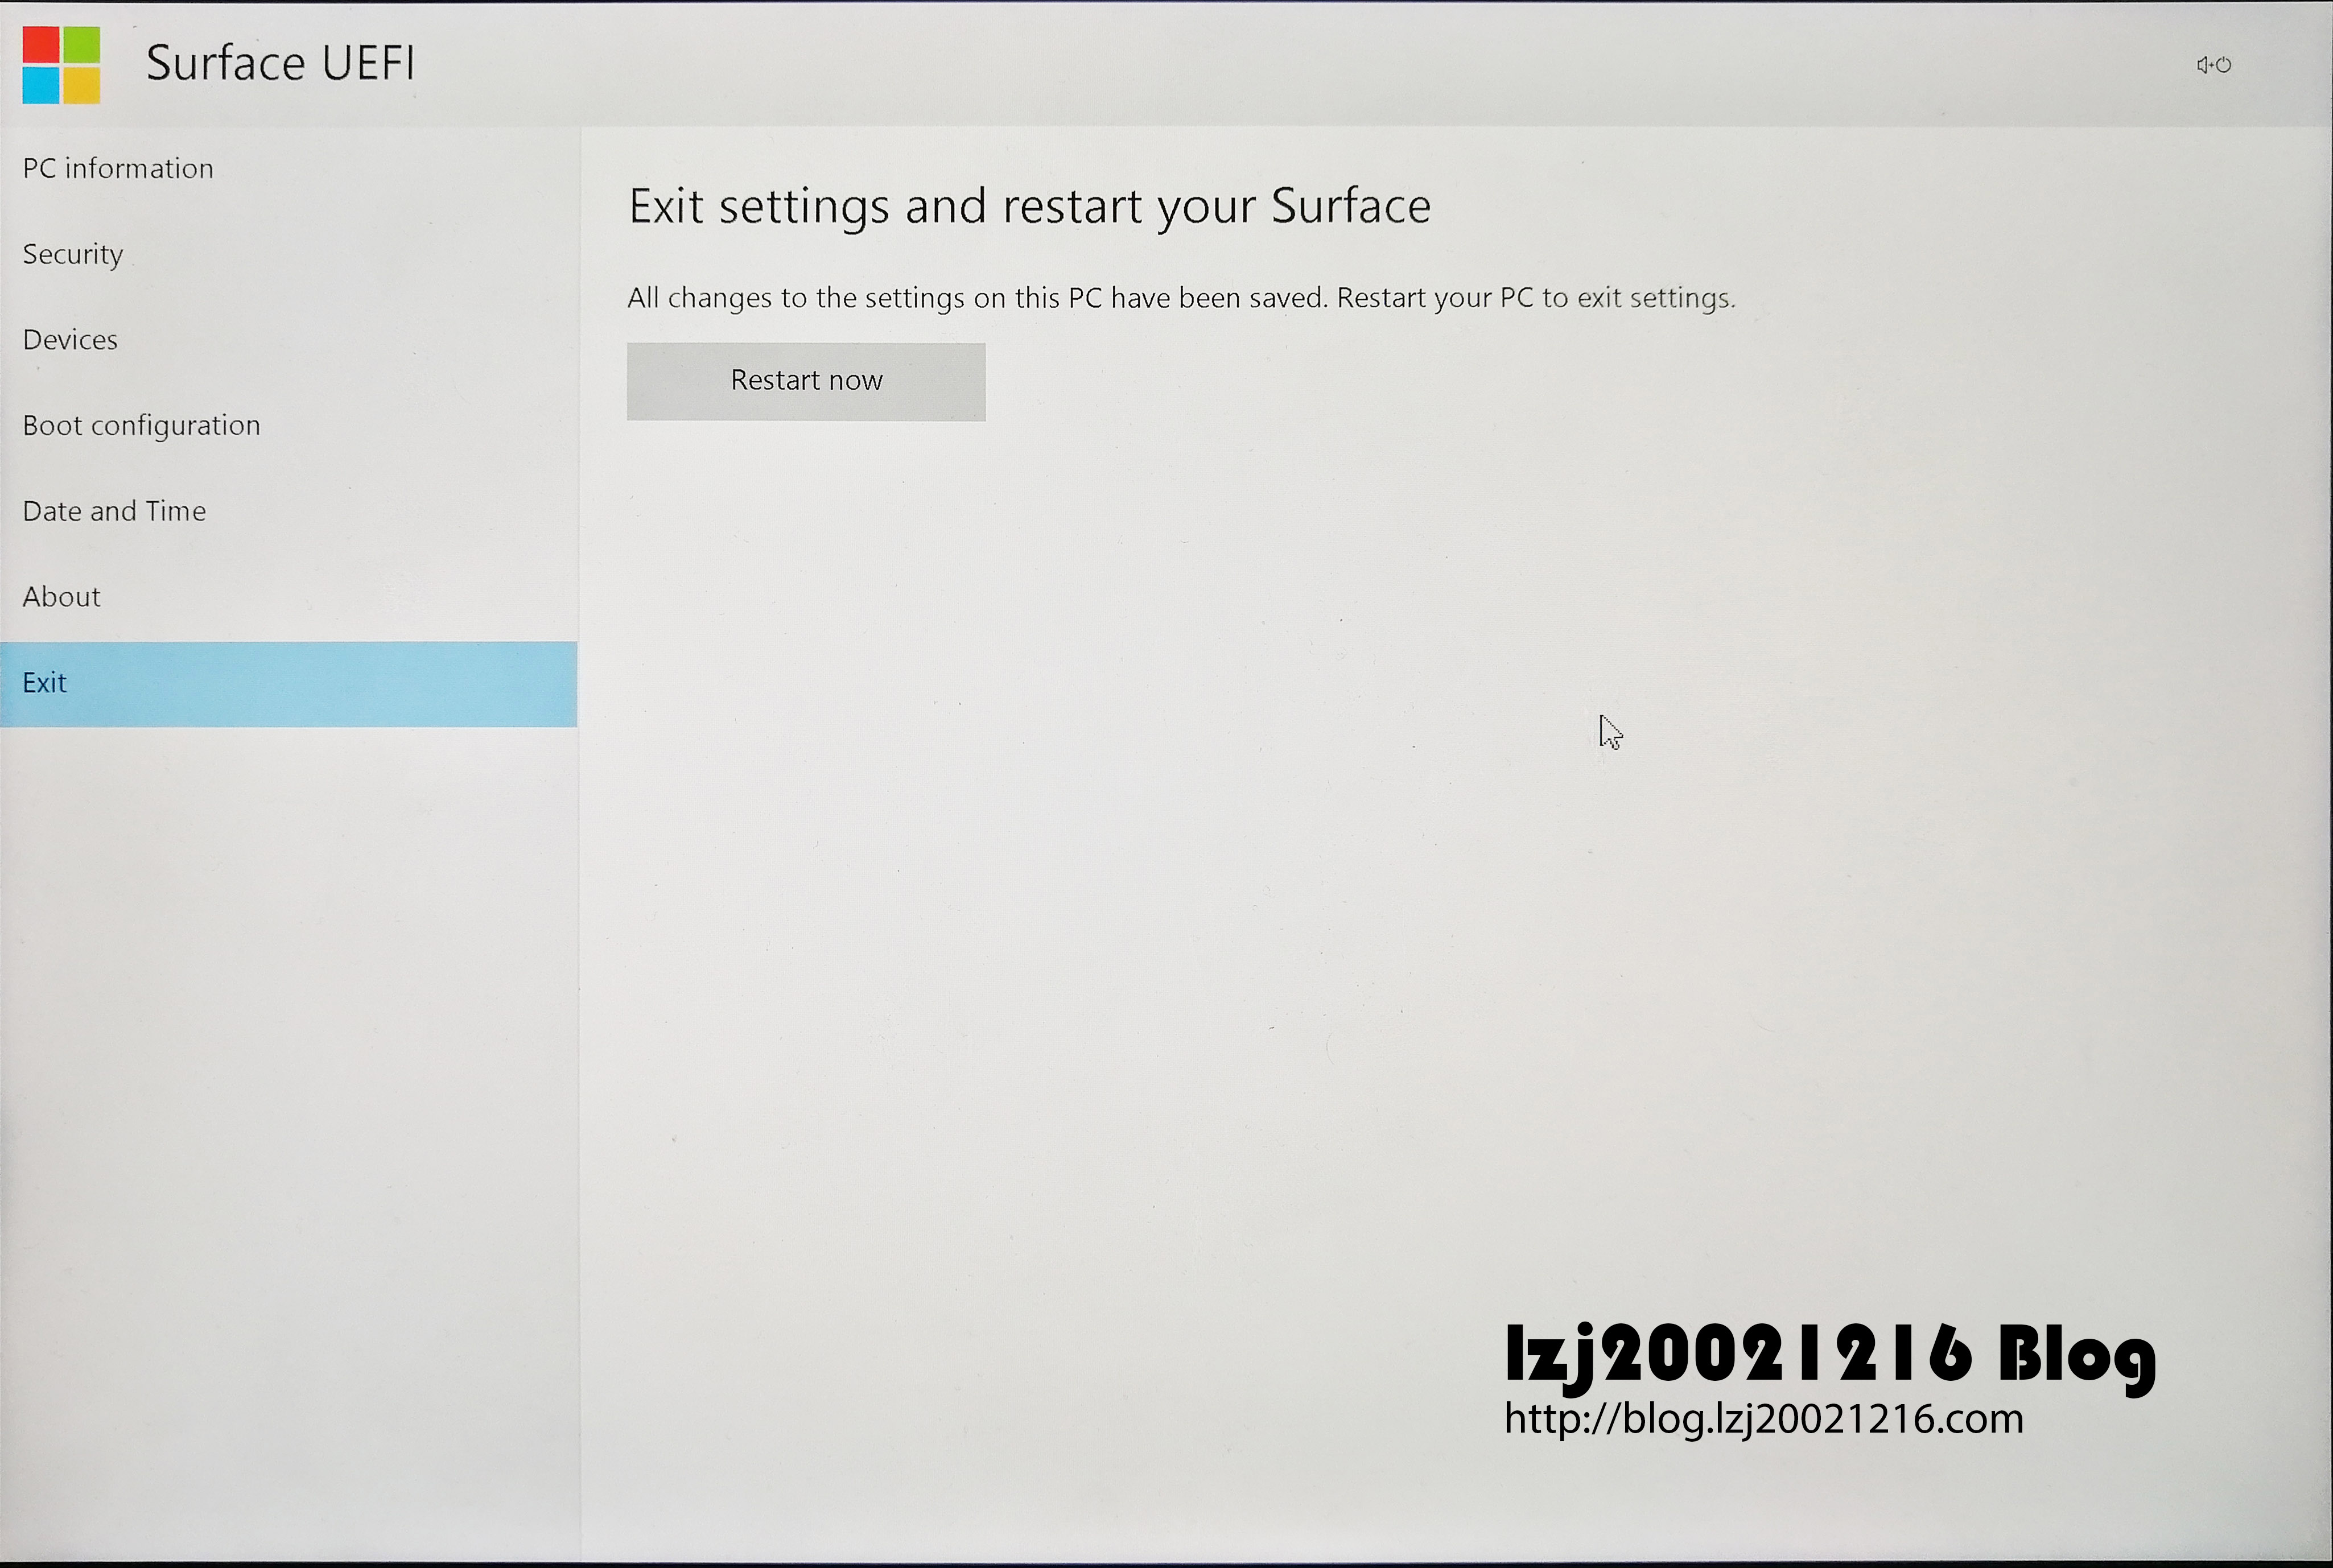
Click Exit label on the left and then click Restart Now button.
-
Your device will automatically boot to the recovery drive.
Select your language and keyboard layout.


The available languages depend on the region you purchased your Surface device.
-
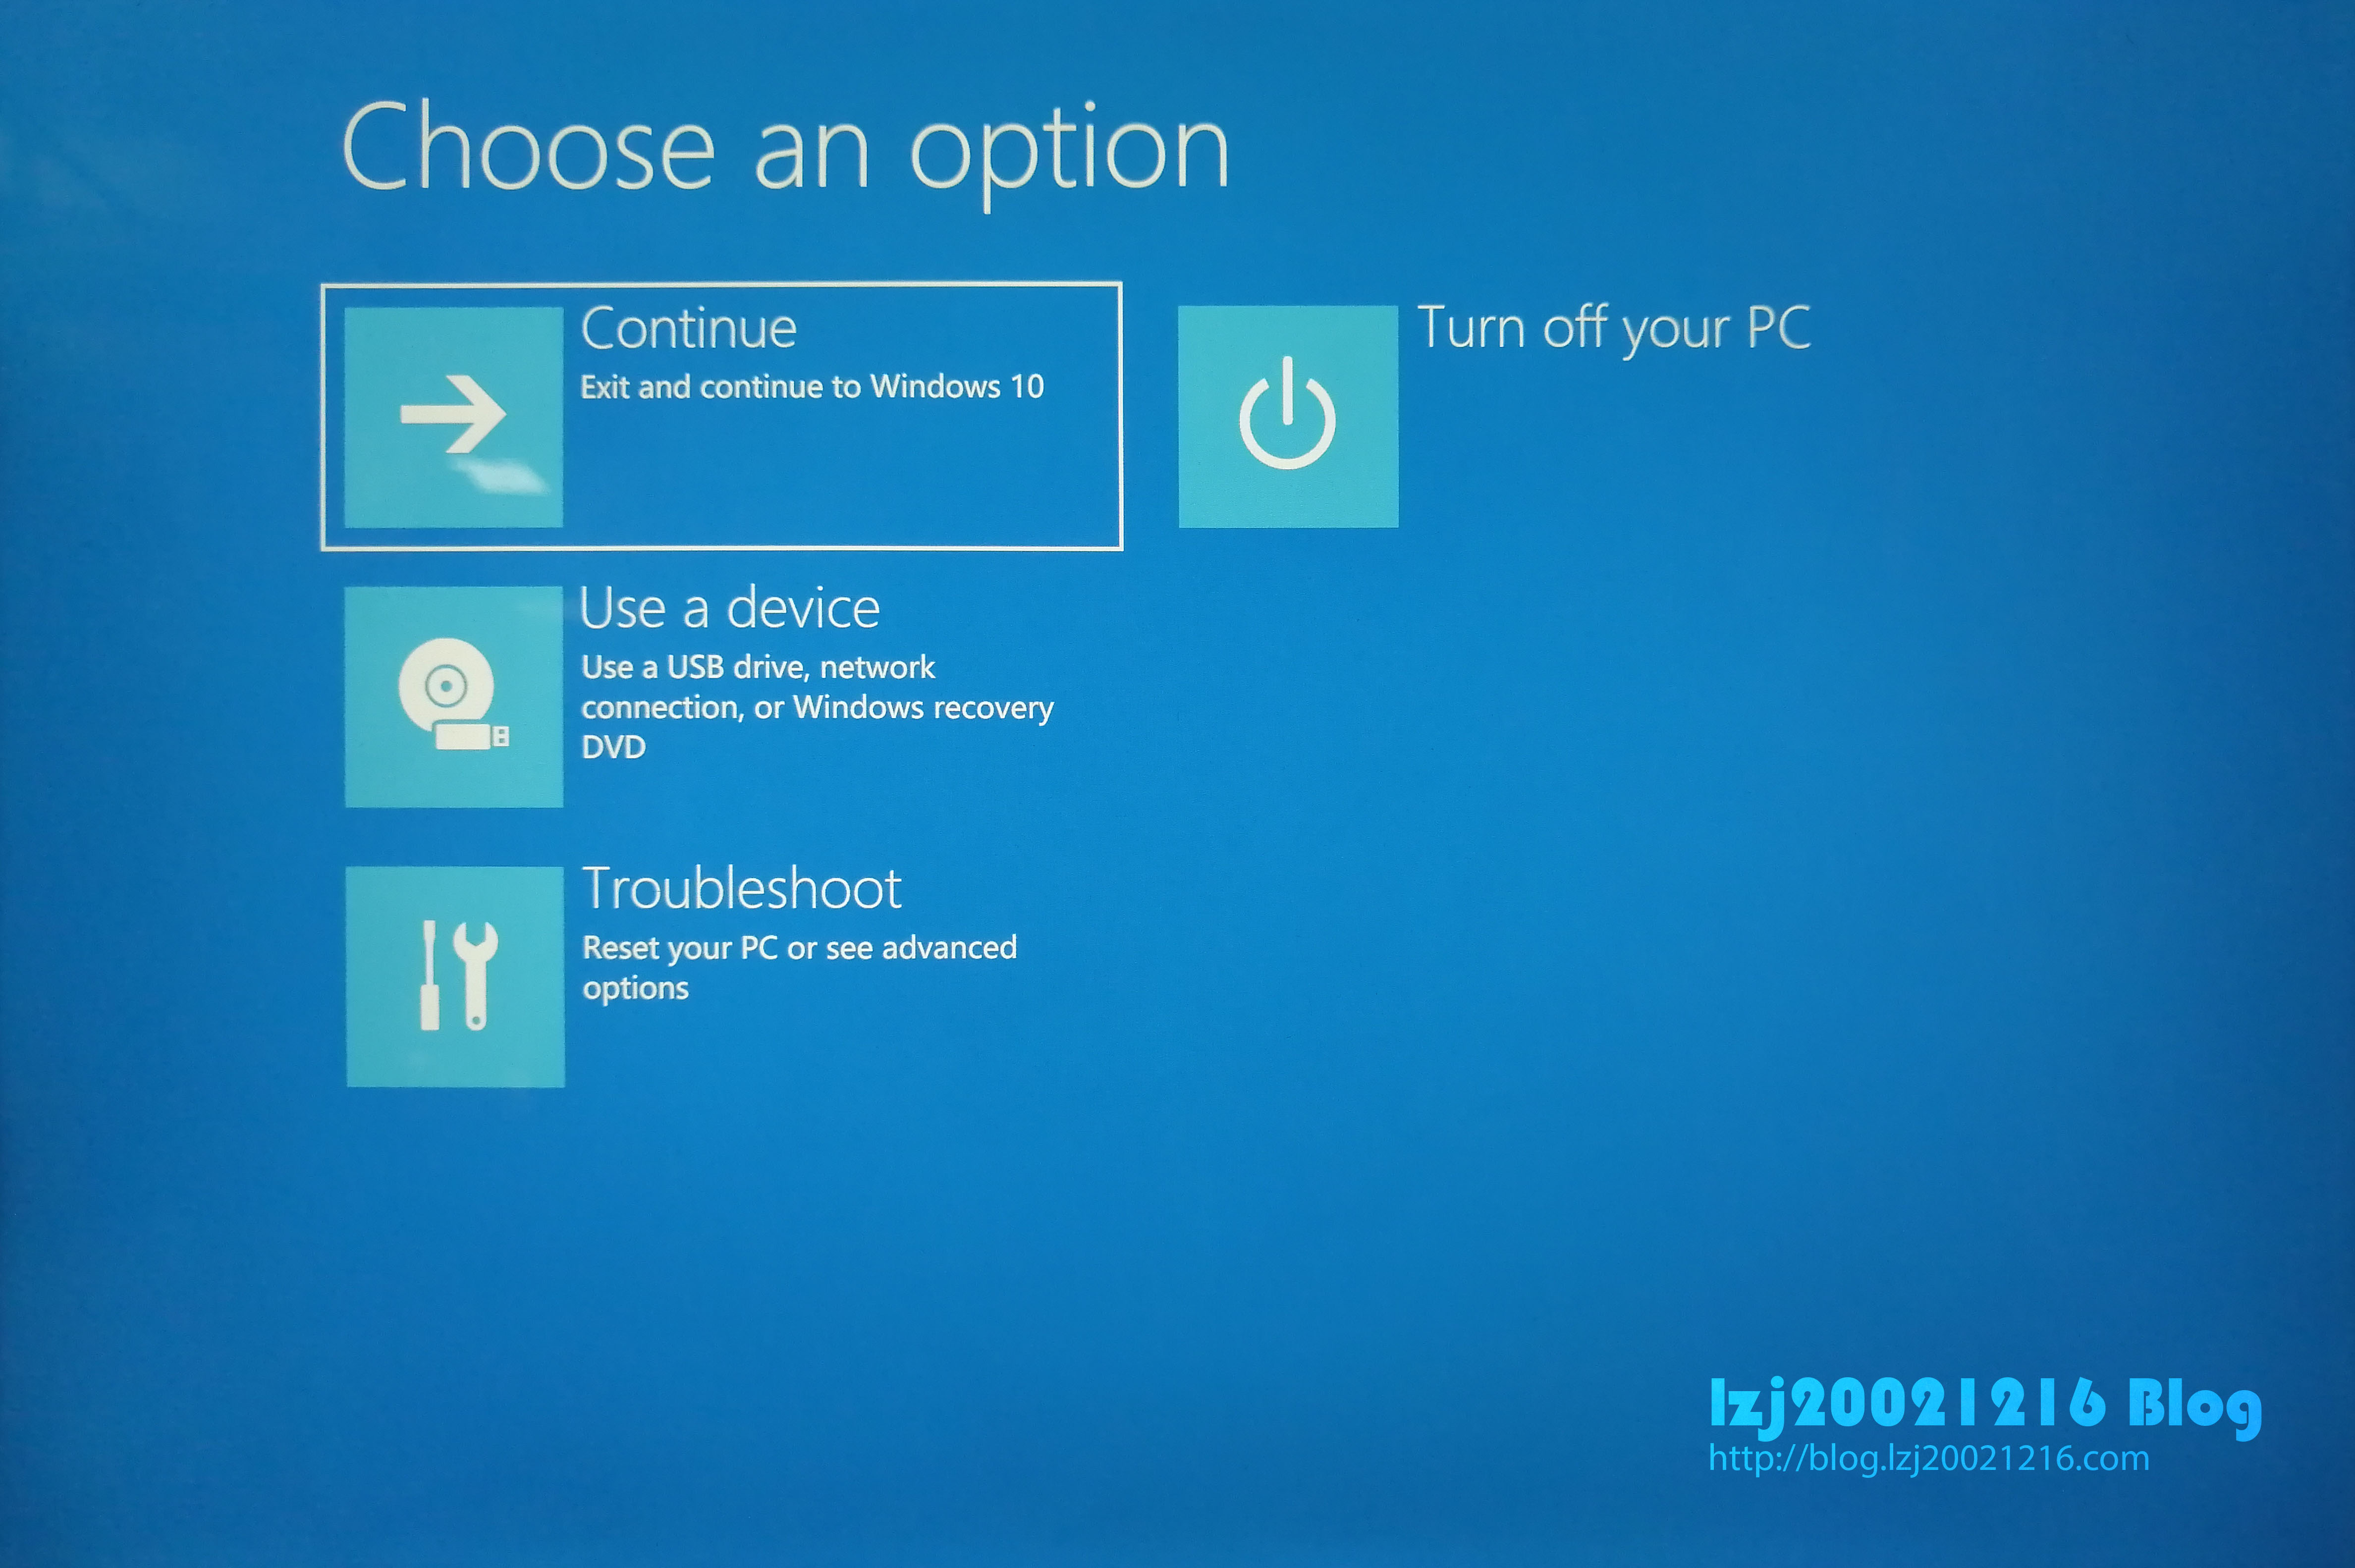
Choose Troubleshoot option.
-
Then select Recover from a drive.
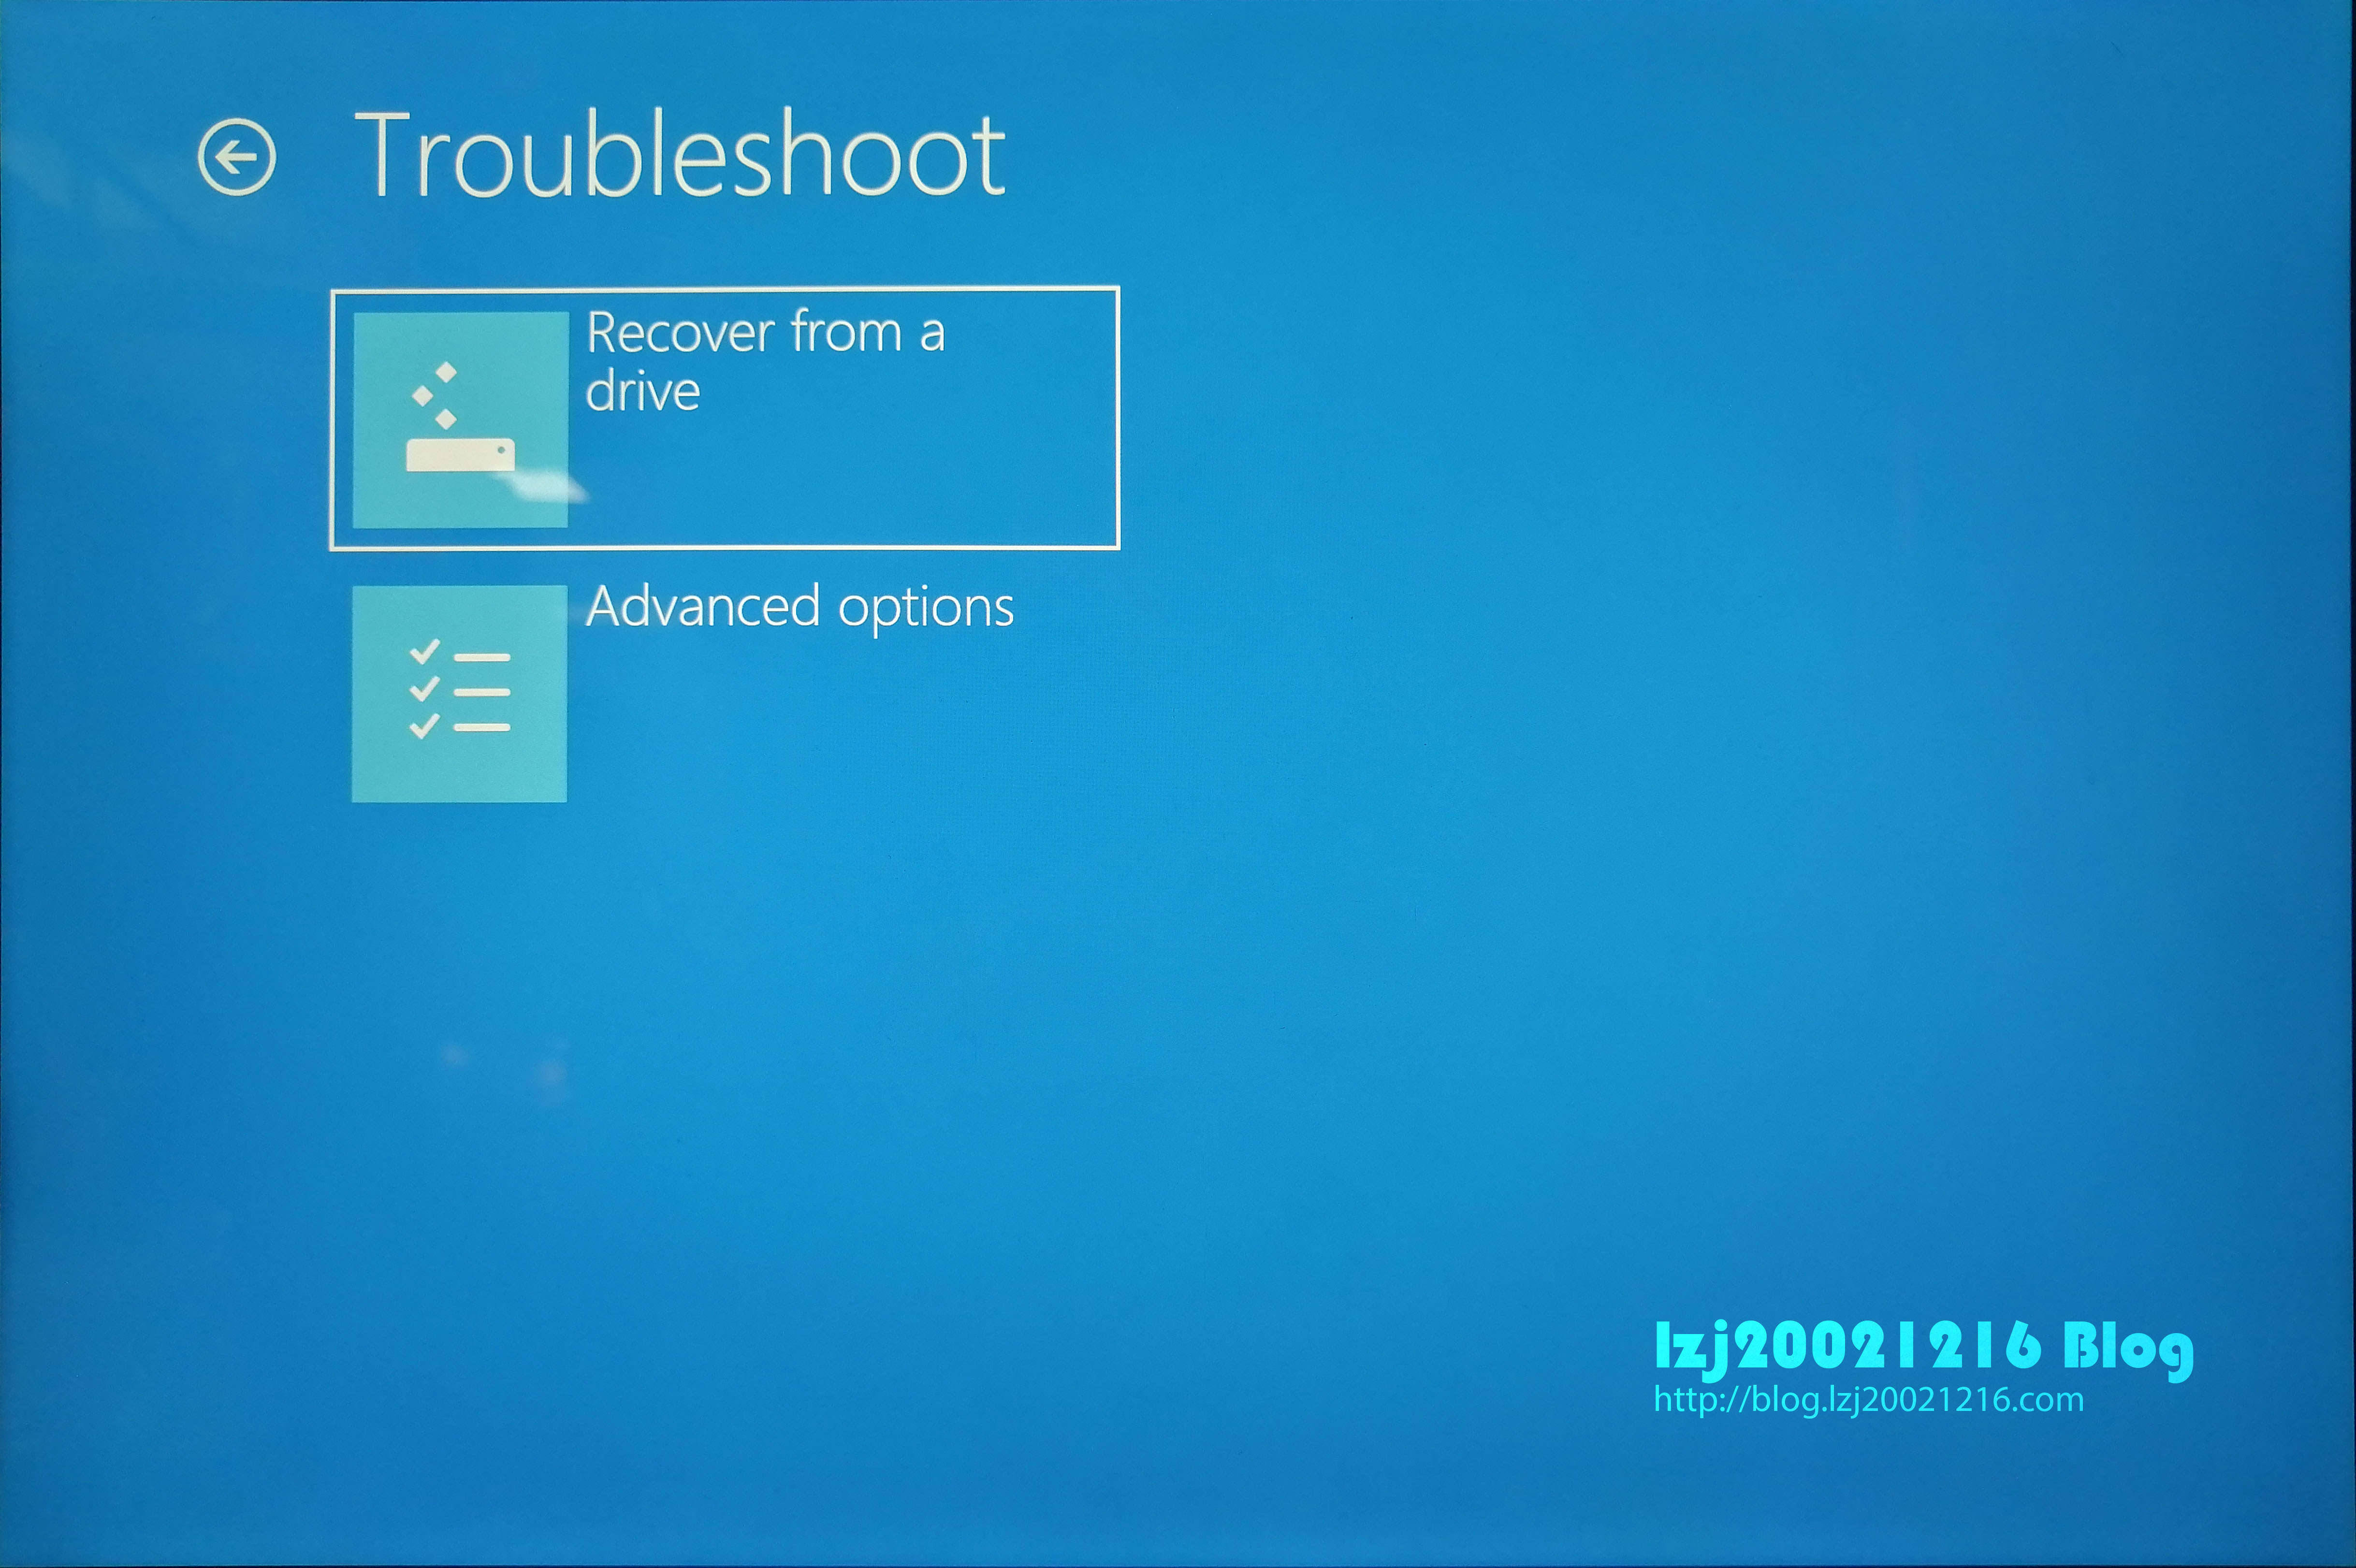
If you do not see the option, here are the probable reasons and the solutions:
1. Something was wrong when you made the recovery drive, just remake it by following the steps mentioned above.
2. Some USB drives cannot be used as a recovery drive for they cannot be recognized by Surface devices even though they are USB 3.0 ones. You need to replace it with other one.
I suggest you choose the Kingston DataTraveler 100 G3.
3. Some online blogs may skip the step of |Create a recovery drive| and just format the recovery drive as FAT32 and then copy the recovery files into it straight. It does work sometimes, but many people had gotten trapped on booting from the drive. So, the method should not be taken. -
You will see the similar page if you have enabled the Bitlocker function on your device. And you need the unlock key to complete the recovery.
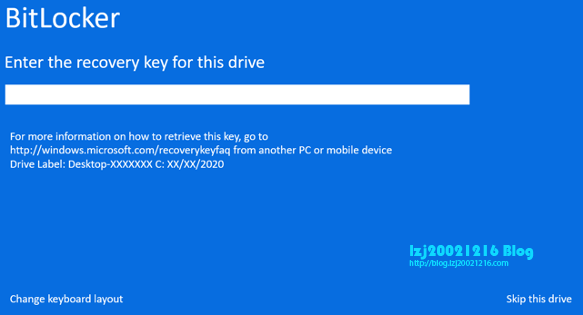
In general, it has been stored in your Microsoft account. Just open the link on your screen on your other devices to get it back.
-
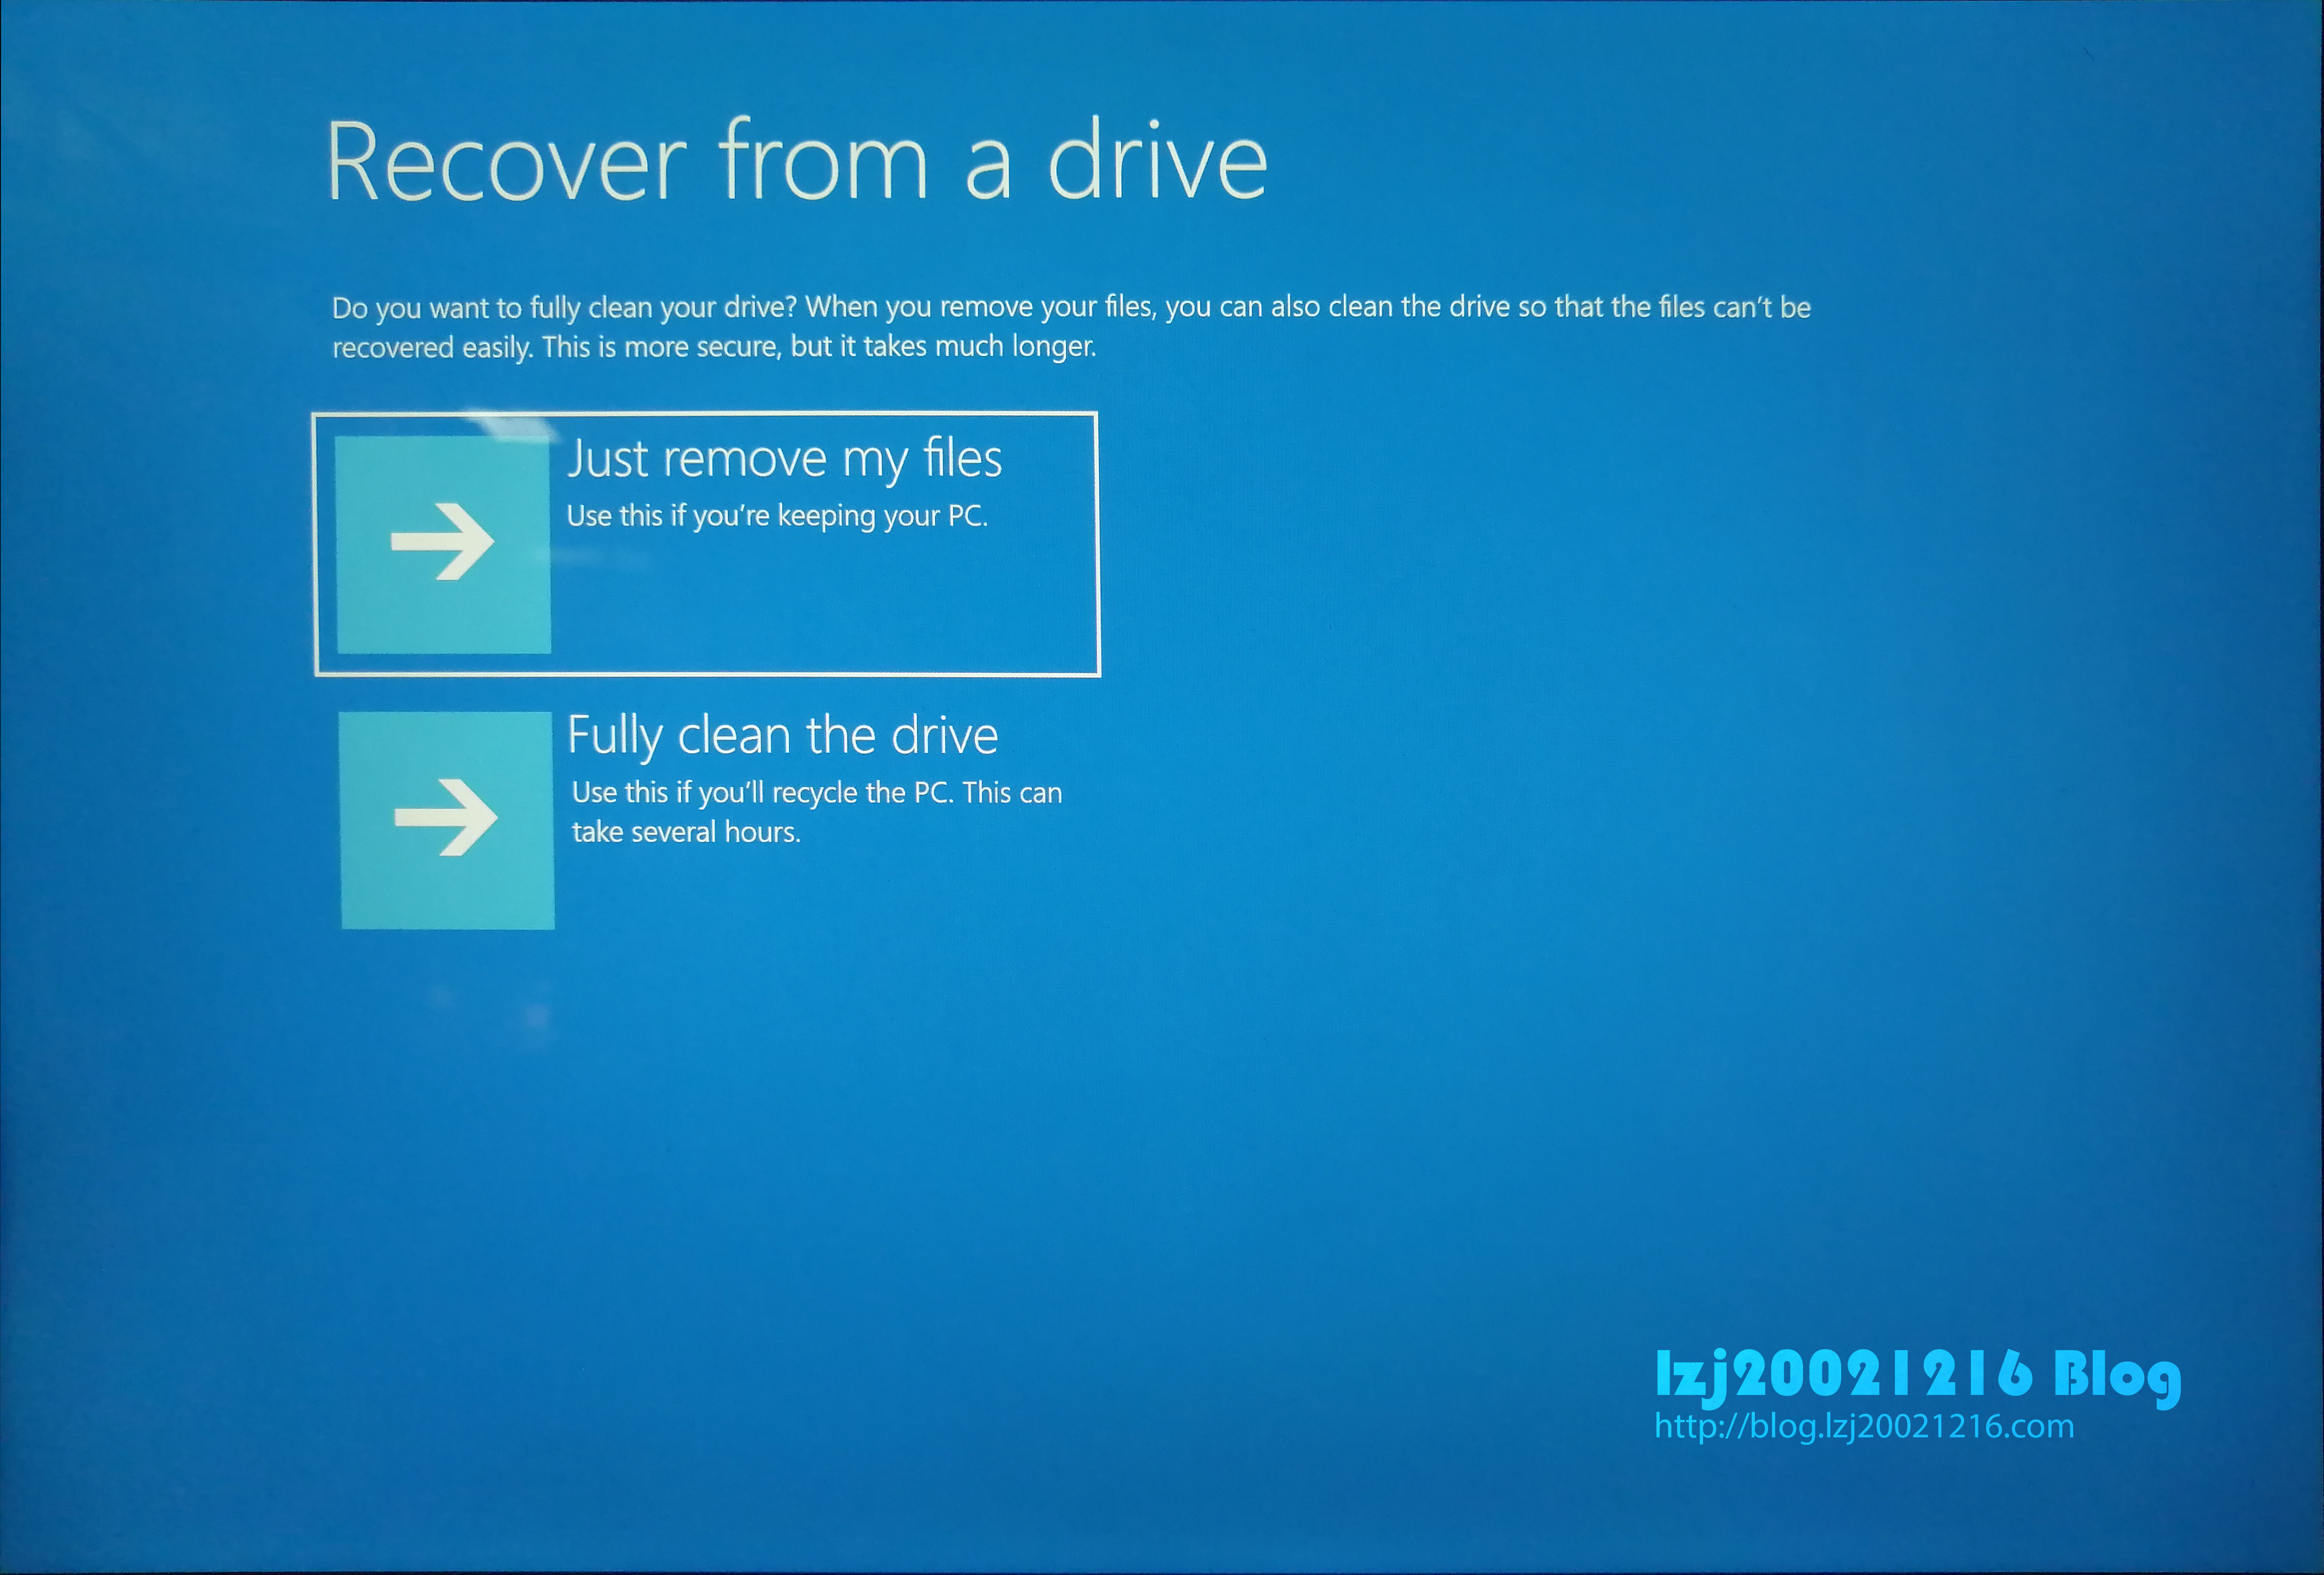
There are two available options: Just remove my files and Full clean the drive. Just remove my files option offers a faster recovery speed but will not clean the drive completely. Choose Full clean the drive if you will not keep the device yourself after the recovery so that your previous person files would not be recovered by others.
-
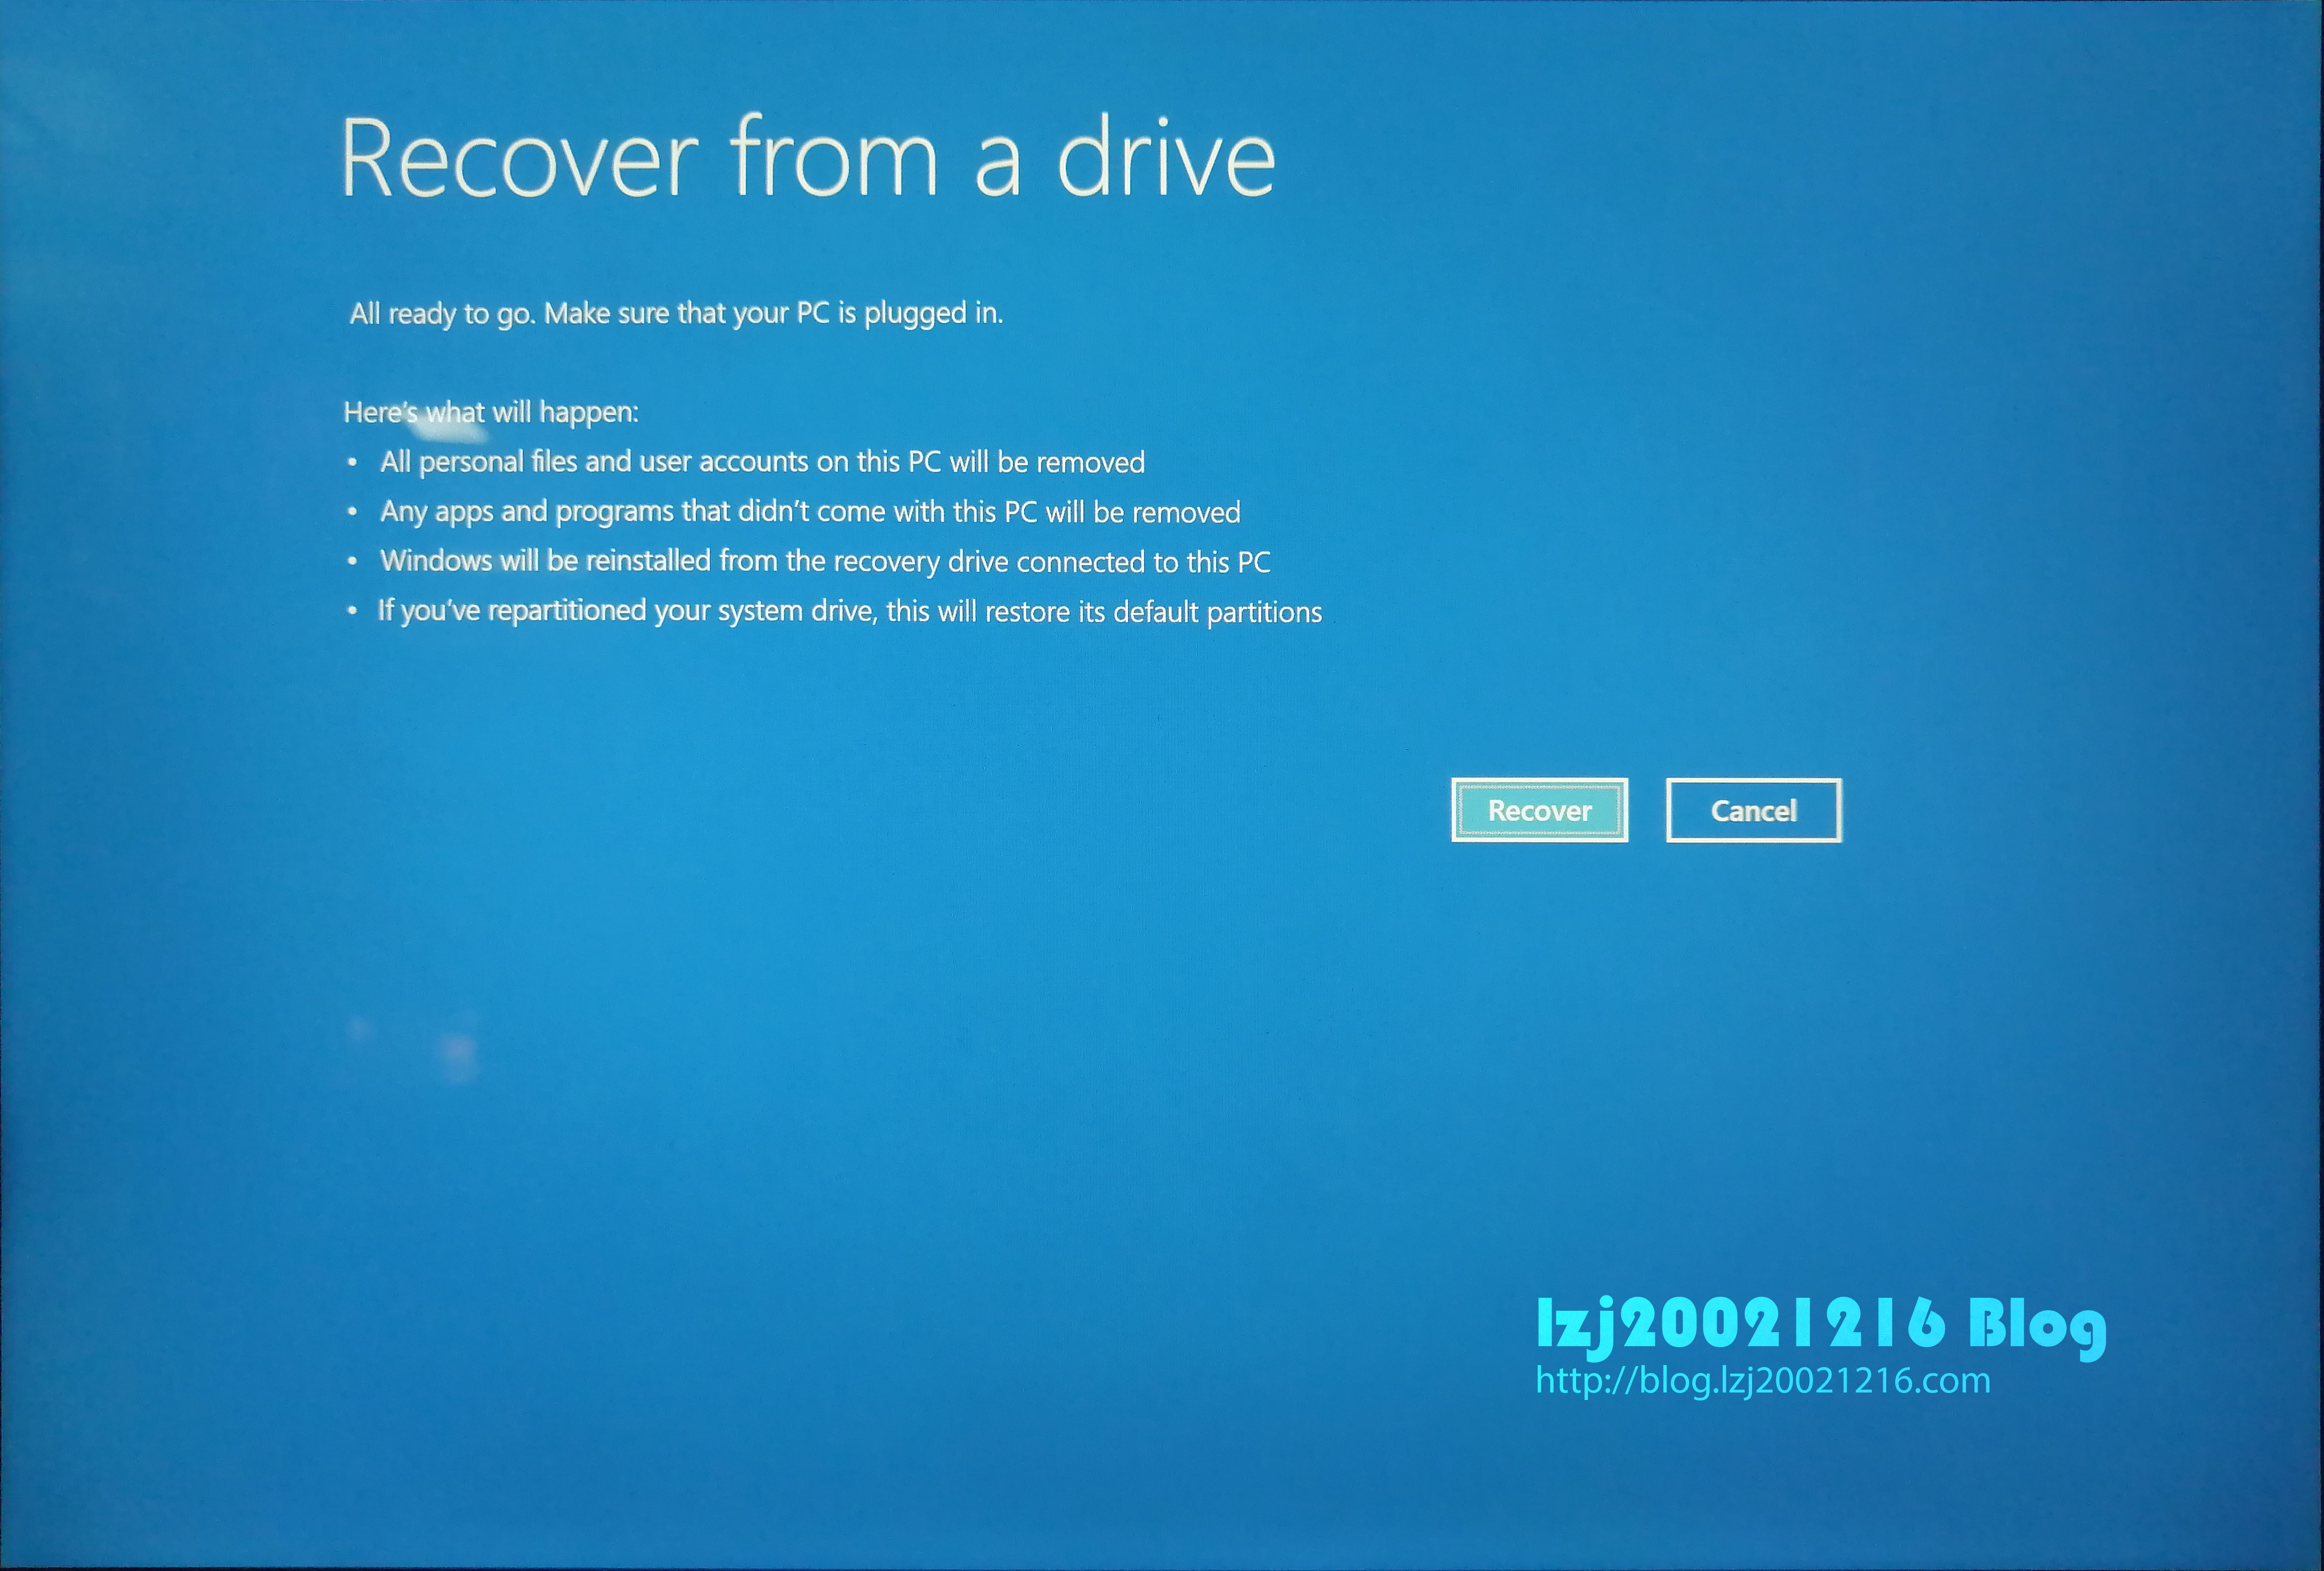
Before the recovery starts, make sure again that you have backed up all your important files on the device as it cannot be terminated while processing. Click Recover button when you are ready.
-
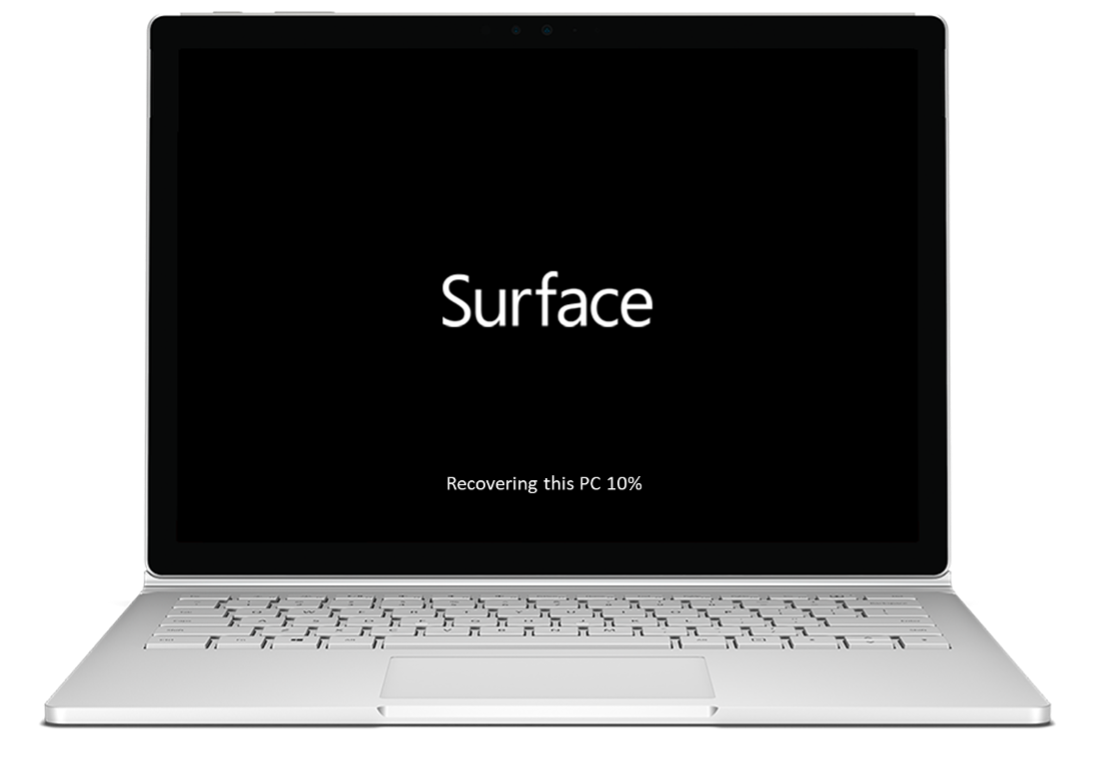
Your device will look like this.
- While recovering, it will ask whether you want to clear the TPM. Typically, you can choose to clear it.
- Your device may reboot several times until it enters Out-of-box experience (OOBE) settings page.
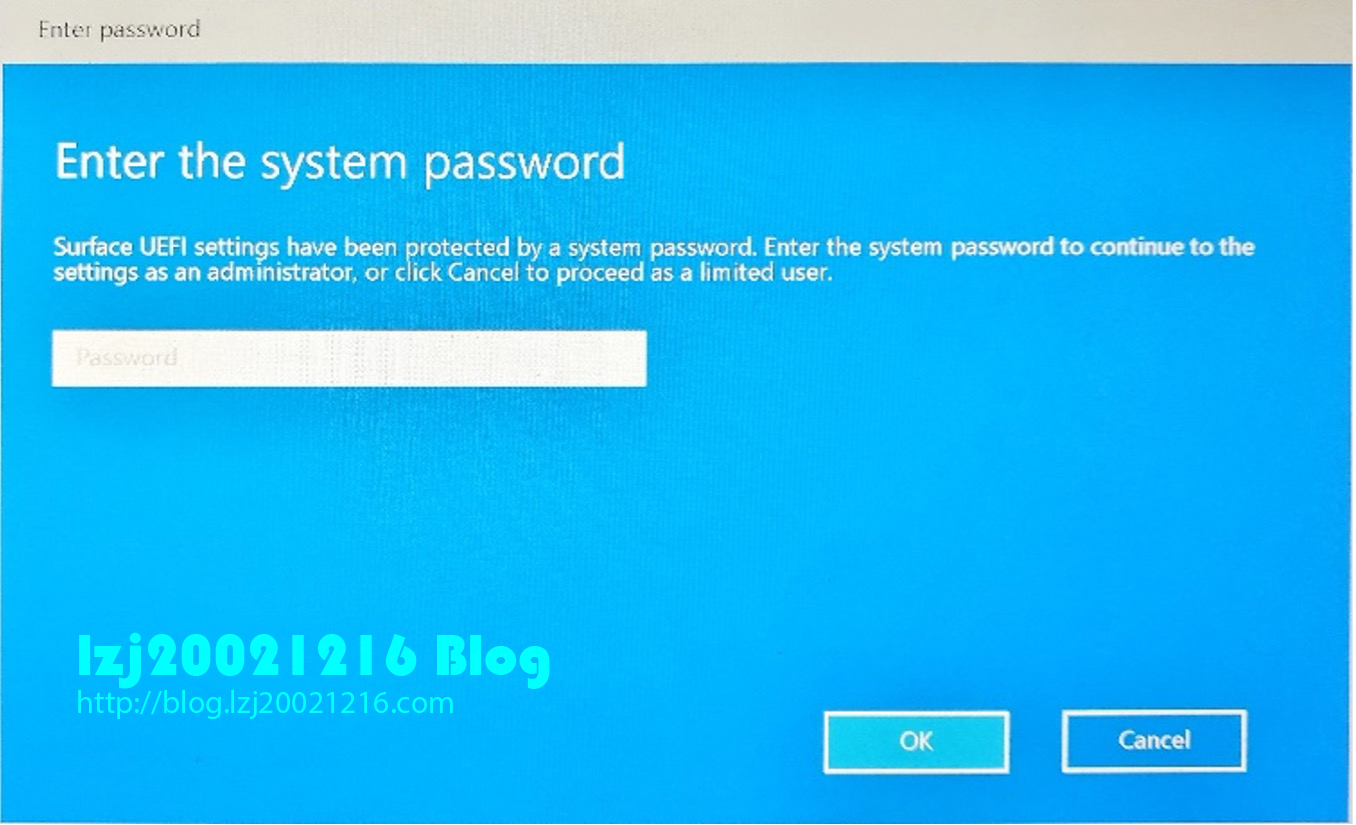
Warnings:
If you used to set a UEFI password, use it to get full Surface UEFI access.
If you forgot it and your device can not boot up Windows, contact Microsoft Support agents for help.
If you forgot it but are lucky enough to have set USB drives as your first boot order, you can just skip the step.
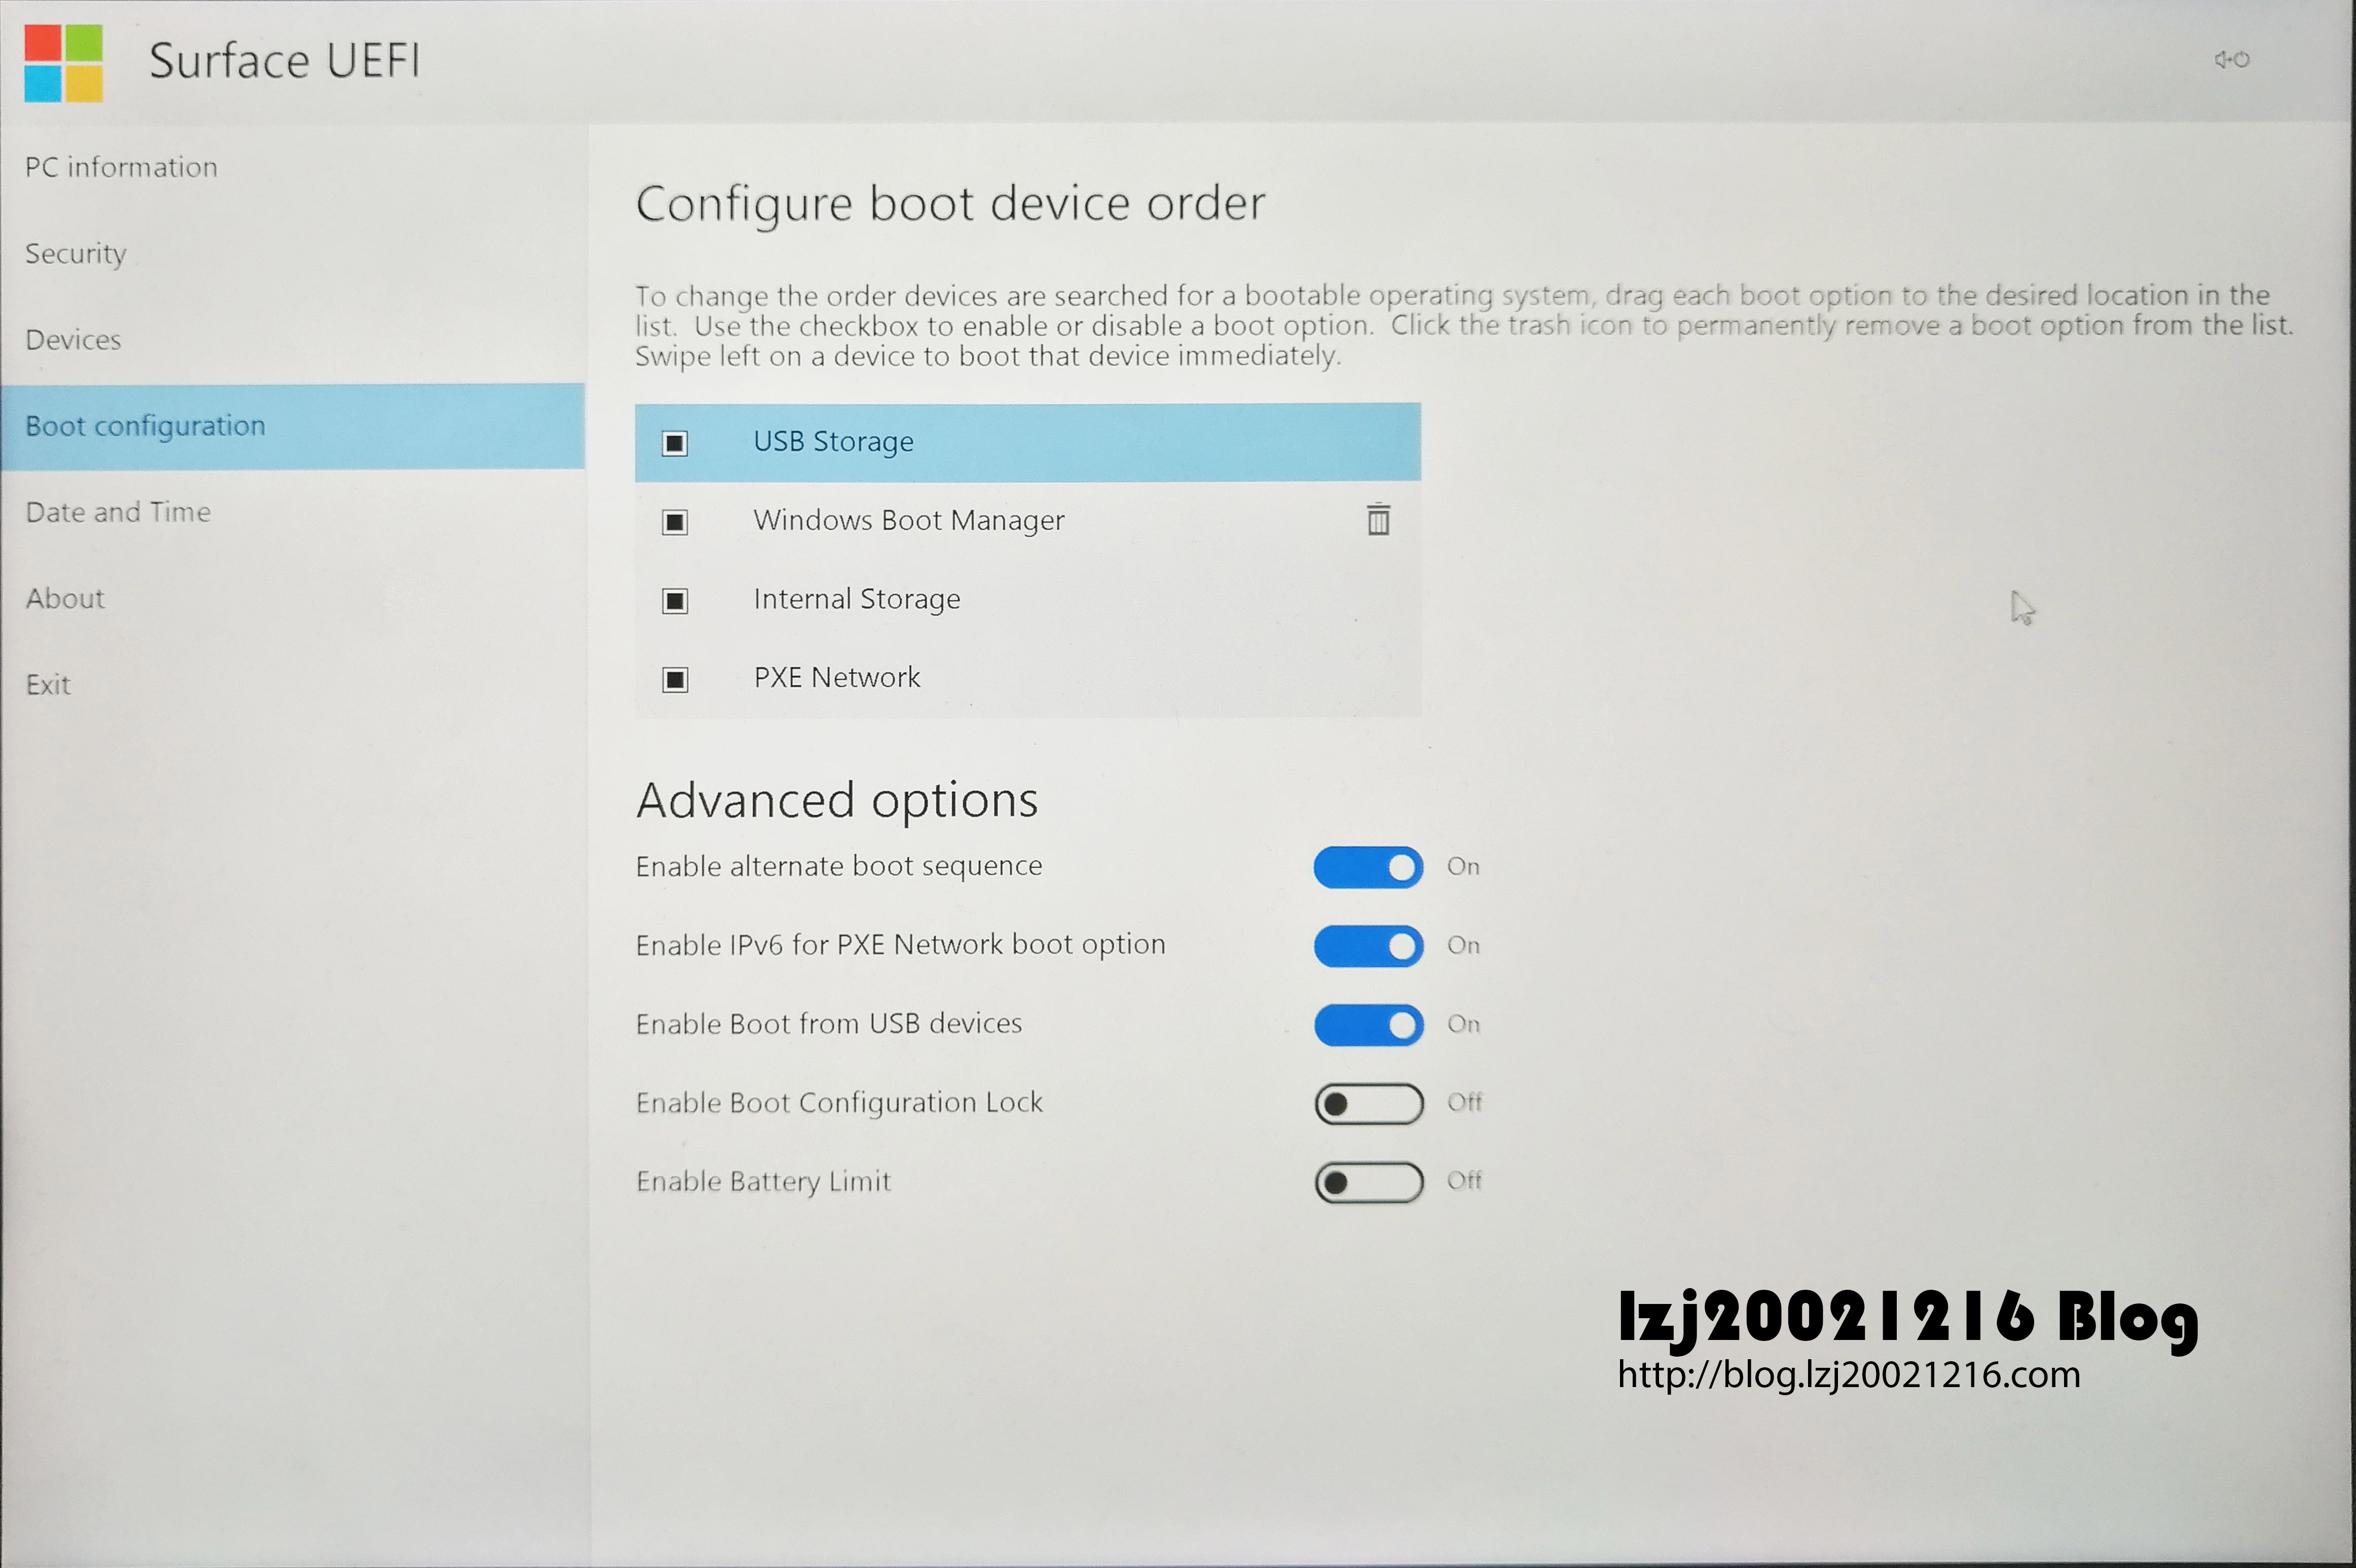
Make sure Enable Boot Configuration Lock is disabled, just like which is shown in the picture above.
Comming soon: Method 4 and FAQs.